How to Use Janitor AI with DeepSeek (Complete Tutorial 2026)
Learn how to connect Janitor AI with DeepSeek by creating an API key and configuring the proxy settings for seamless AI-powered conversations in 2026.
This page may contain affiliate links. We may earn a commission at no extra cost to you. Full disclosure.
- 01Navigate to DeepSeek's official website and access the API developer platform
- 02Create a new API key in DeepSeek and store it securely
- 03Open Janitor AI's API settings via the menu icon in the top right
- 04Create a new proxy configuration with the DeepSeek details
- 05Fill in the model name (deepseek-chat), proxy URL (https://chat.deepseek.com), endpoint path (/chat/completions), and API key
- 06Save and test the configuration with a sample message
Introduction
This tutorial walks you through connecting Janitor AI with DeepSeek's advanced language model via API integration. You'll obtain a DeepSeek API key and configure Janitor AI's proxy settings to enable DeepSeek-powered conversations. By the end of this guide, your Janitor AI chats will run smoothly on DeepSeek's infrastructure.
This integration leverages DeepSeek's natural language processing capabilities within your existing Janitor AI workflows. The setup process takes approximately 5-10 minutes and requires no technical expertise beyond following our step-by-step instructions.
Navigate to the DeepSeek Official Website
Open your web browser and search for "DeepSeek" using your preferred search engine.
Identify the official DeepSeek website link by matching DeepSeek's official branding and verifying clear navigation options for accessing their services.
This step corresponds to the first 15 seconds of the video where we locate the official DeepSeek platform.
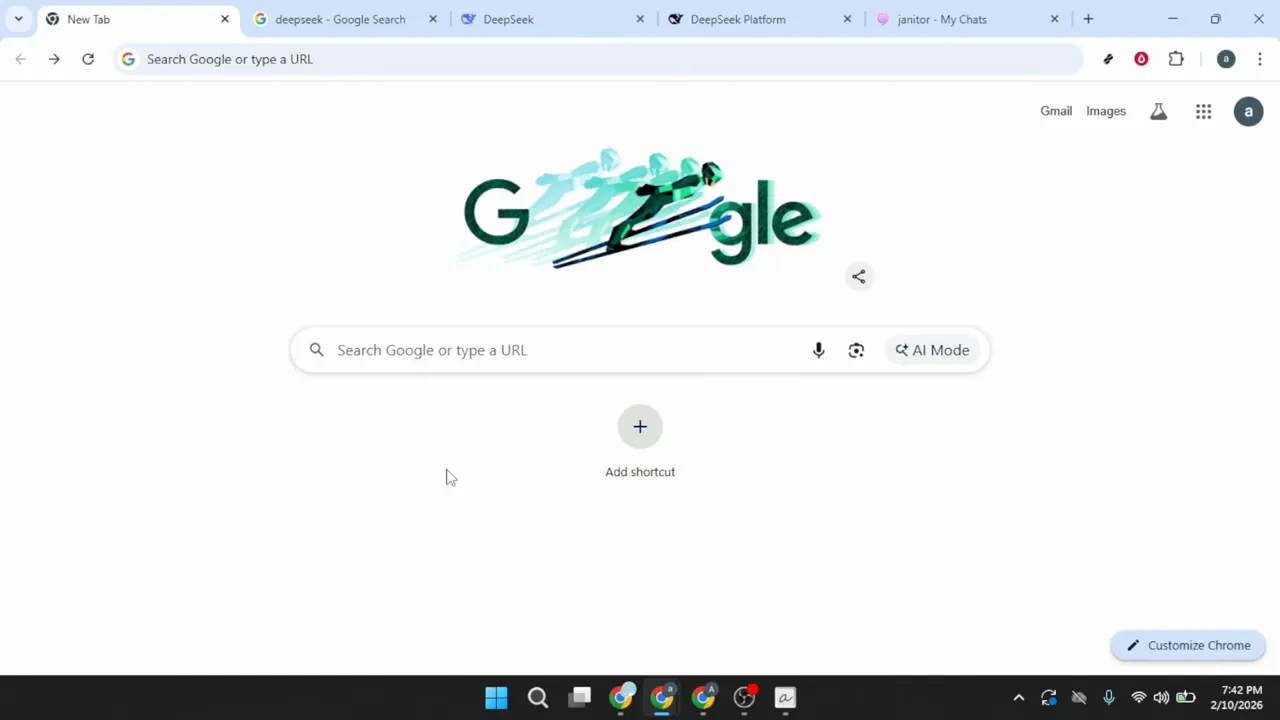
Open your web browser and search for "DeepSeek" using your preferred search engine. Scan the results for the official DeepSeek website, which appears near the top of the page. Avoid clicking on sponsored links or third-party websites that may appear in the search results—the official website displays DeepSeek's branding and provides clear navigation to their developer platform.
Identify the official DeepSeek website link by matching DeepSeek's official branding and verifying clear navigation options for accessing their services. The domain should reflect DeepSeek's official branding.
This step corresponds to the first 15 seconds of the video where we locate the official DeepSeek platform. 0:00
Access the DeepSeek API Developer Platform
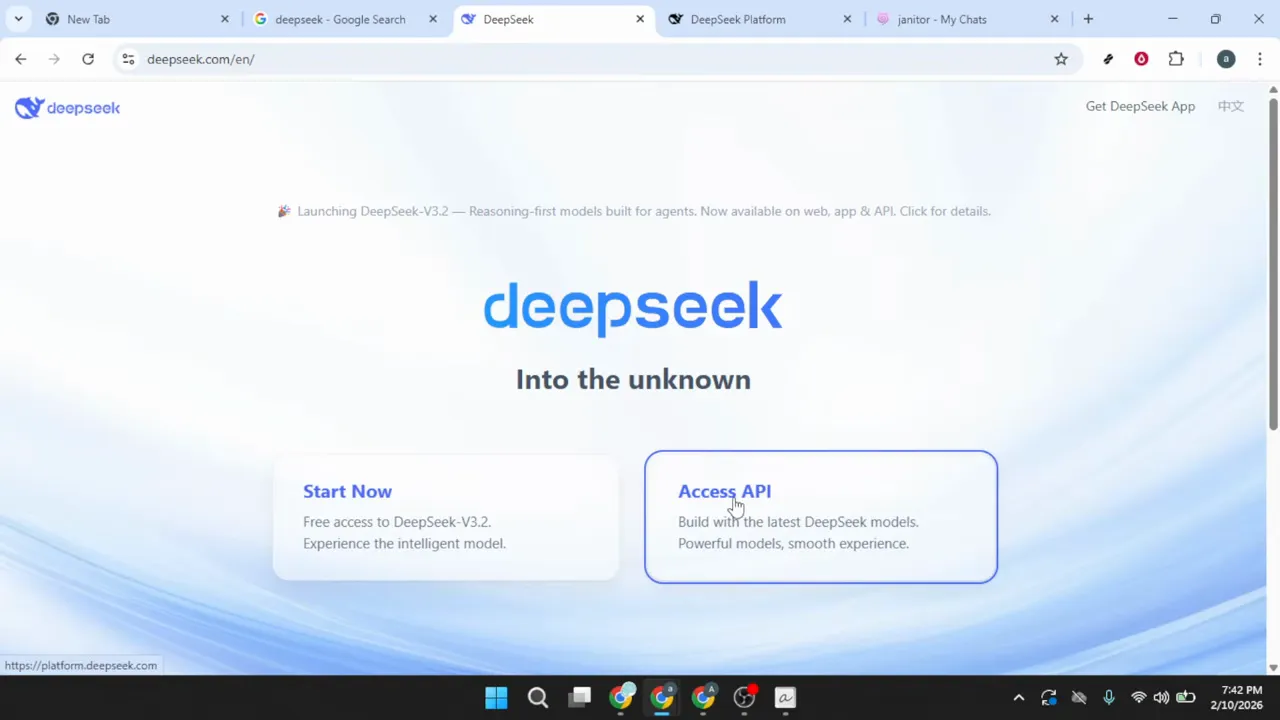
Once you arrive at the DeepSeek homepage, locate an option labeled Access API or similar terminology in the main navigation menu.
The developer platform is where you'll manage API keys, view documentation, and monitor usage.
After successfully logging in, you should see your personal dashboard.
Once you arrive at the DeepSeek homepage, locate an option labeled Access API or similar terminology in the main navigation menu. This button typically appears prominently on the homepage or in the top navigation bar. Click on this option to be redirected to the DeepSeek developer platform.
The developer platform is where you'll manage API keys, view documentation, and monitor usage. If you're not already logged in, the system will prompt you to sign in or create a new account. Complete the authentication process using your preferred method—this may include email verification or social login options.
After successfully logging in, you should see your personal dashboard. This dashboard provides access to API management tools, billing information, and usage statistics.
This section covers the video content from 00:15 to 00:31, where we navigate to the API access point. 00:15
Create a New DeepSeek API Key
On the DeepSeek platform dashboard, locate the section labeled API Keys or API Management.
Select the button or link to Create New API Key or similar wording.
Some platforms allow you to set permissions or usage limits for API keys.
On the DeepSeek platform dashboard, locate the section labeled API Keys or API Management. This section may appear in a sidebar menu or as a prominent card on the main dashboard. Click on the option to view your existing API keys or create new ones.
Select the button or link to Create New API Key or similar wording. A dialog box or new page will appear asking you to configure the key settings. Enter a descriptive name for your API key that will help you identify its purpose later—for example, "Janitor AI Integration" or "DeepSeek Chat Connection."
Some platforms allow you to set permissions or usage limits for API keys. If these options appear, configure them according to your needs, though default settings typically work well for general use. After configuring the key name and any optional settings, click the Create or Generate button to finalize the creation.
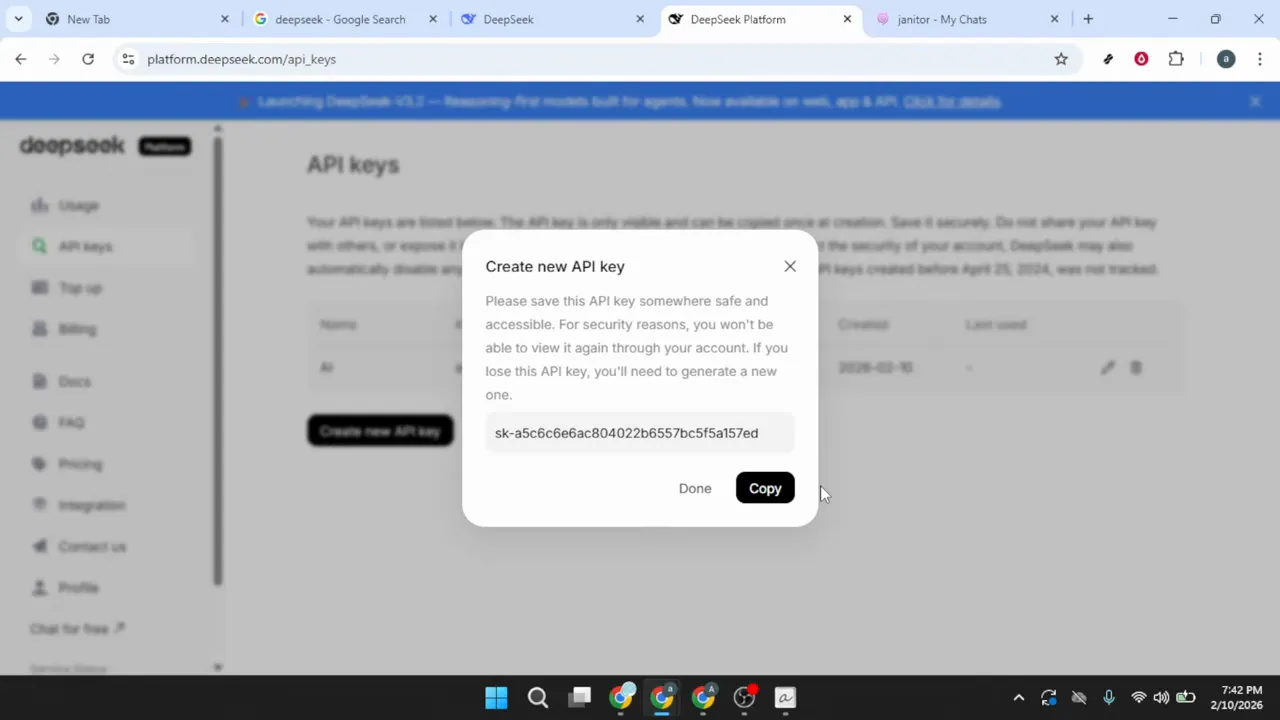
The system will generate a unique API key string, typically consisting of letters, numbers, and special characters. This key will appear on your screen, often in a highlighted text box or modal window. Copy this key immediately by clicking a copy button or manually selecting and copying the text.
Critical Security Step: Store this API key in a secure location immediately after copying it. Many platforms display the full API key only once for security reasons. If you navigate away or close the window without saving it, you'll need to generate a new key. Never share this key publicly, commit it to public code repositories, or paste it in unsecured documents.
Consider using a password manager or secure notes application to store your API key. Treat it with the same level of security as you would a password, as anyone with access to this key can make API calls under your account.
This section corresponds to the video segment from 00:31 to 01:13, covering the complete API key creation process. 00:31
Open Janitor AI API Settings
Switch to the Janitor AI platform in your web browser.
In the chat interface, look for the menu icon in the top right corner of the screen.
From the dropdown menu, locate and select the option labeled API Settings or Settings.
Switch to the Janitor AI platform in your web browser. If you don't already have a chat window open, navigate to any existing chat or create a new one. The specific chat you choose doesn't matter, as the API settings apply globally across all your conversations.
In the chat interface, look for the menu icon in the top right corner of the screen. This icon typically appears as three horizontal lines (often called a "hamburger menu") or three vertical dots. Click on this icon to reveal the dropdown menu with various settings and options.
From the dropdown menu, locate and select the option labeled API Settings or Settings. This will open a new panel or page where you can configure how Janitor AI connects to external language models. The settings interface provides options for different API providers and connection methods.
This step covers the video content from 01:13 to 01:31, where we navigate to the proxy configuration area. 01:13
Configure a New DeepSeek Proxy Connection
Within the API settings interface, look for a tab or section labeled Proxy or Proxy Settings.
Click the button labeled Add Configuration or + New Proxy to begin creating a new connection profile.
In the first field, labeled Configuration Name or similar, enter a descriptive identifier such as "DeepSeek" or "DeepSeek Chat.
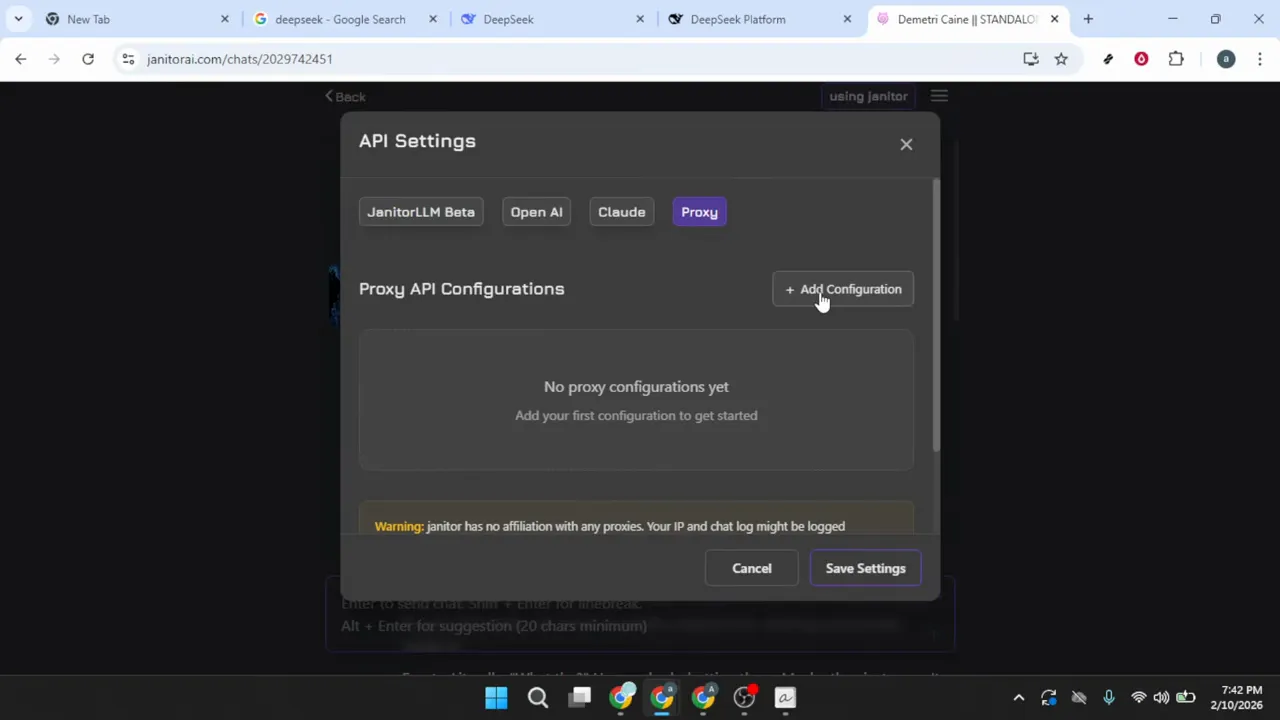
Within the API settings interface, look for a tab or section labeled Proxy or Proxy Settings. Click on this tab to access the proxy configuration options. Proxy settings allow Janitor AI to route your chat requests through external AI providers like DeepSeek.
Click the button labeled Add Configuration or + New Proxy to begin creating a new connection profile. A configuration form will appear with multiple fields that need to be completed accurately. Each field plays a specific role in establishing the connection between Janitor AI and DeepSeek.
In the first field, labeled Configuration Name or similar, enter a descriptive identifier such as "DeepSeek" or "DeepSeek Chat." This name helps you distinguish between multiple proxy configurations if you use several AI providers. Choose something memorable that clearly indicates this connection uses DeepSeek.
The configuration form will present several additional fields that require specific technical information. Fill each of these in the following steps to complete the proxy setup. Keep the configuration window open as you proceed.
This section corresponds to the video segment from 01:31 to 02:23, where we begin the proxy configuration process. 01:31
Enter the DeepSeek Model Name
Locate the field labeled Model Name or Model Identifier within the proxy configuration form.
Type "deepseek-chat" into the model name field, paying careful attention to the exact spelling and formatting.
If DeepSeek has released newer models since this tutorial, you may substitute the model name with an updated version.
Locate the field labeled Model Name or Model Identifier within the proxy configuration form. This field specifies which DeepSeek model Janitor AI should use for generating responses. The exact model name must match DeepSeek's API specifications for the connection to work properly.
Type "deepseek-chat" into the model name field, paying careful attention to the exact spelling and formatting. The model name should be lowercase, with a hyphen between "deepseek" and "chat." Do not include spaces, underscores, or capital letters unless explicitly shown in updated documentation.
Formatting is critical: Even small variations like "DeepSeek-Chat," "deepseek_chat," or "deepseekchat" will cause connection failures. The API expects the exact string as specified in DeepSeek's documentation. Double-check your entry character by character before proceeding.
If DeepSeek has released newer models since this tutorial, you may substitute the model name with an updated version. However, "deepseek-chat" represents the standard conversational model and works for most use cases.
Set the Proxy URL
Find the field labeled Proxy URL, Base URL, or API Endpoint in the configuration form.
Enter the following URL: `https://chat.
Ensure the URL includes "https://" at the beginning—this indicates a secure connection and is required for API communication.
Find the field labeled Proxy URL, Base URL, or API Endpoint in the configuration form. This field specifies the web address where Janitor AI will send chat requests to reach DeepSeek's servers. The URL must be entered exactly as specified to establish a successful connection.
Enter the following URL: https://chat.deepseek.com
Ensure the URL includes "https://" at the beginning—this indicates a secure connection and is required for API communication. Do not include "http://" without the "s," as this may cause security errors or connection failures. Verify that there are no trailing slashes at the end of the URL.
Check your entry carefully for common typing errors. The URL should have exactly two "e" letters in "deepseek," and the domain should end with ".com." Any misspelling will prevent Janitor AI from locating the DeepSeek API servers.
Some configurations may show this field as "Base URL" and require you to add the endpoint path separately. If you see a separate field for the endpoint path in the next step, do not add "/chat/completions" to this URL field.
Add the Chat Completions Endpoint Path
Look for a field labeled Endpoint Path, API Route, or Completion Endpoint in the proxy configuration form.
If your configuration form includes a dedicated endpoint path field, enter: `/chat/completions`
This path follows the OpenAI API standard for chat completion endpoints.
Look for a field labeled Endpoint Path, API Route, or Completion Endpoint in the proxy configuration form. This field specifies the specific function path on DeepSeek's API that handles chat message generation. Not all proxy configurations separate this field from the base URL.
If your configuration form includes a dedicated endpoint path field, enter: /chat/completions
This path follows the OpenAI API standard for chat completion endpoints. The forward slash at the beginning is important and should be included. Do not add spaces before or after the path. The endpoint path tells the API which specific service to call—in this case, the chat completion service that generates conversational responses.
If your configuration form does not have a separate endpoint path field, you may need to append this path to the proxy URL. In that case, the full URL would be: https://chat.deepseek.com/chat/completions. However, most modern Janitor AI configurations separate these fields for clarity.
Some interfaces provide a dropdown menu of common endpoint paths. If you see options like "/v1/chat/completions" or "/chat/completions," select the one that matches DeepSeek's API documentation. When in doubt, "/chat/completions" is the standard path for chat-based models.
Paste Your DeepSeek API Key
Locate the field labeled API Key, Authorization Key, or Authentication Token in the proxy configuration form.
Retrieve the API key you saved securely after creating it in the DeepSeek developer platform.
Do not modify or edit the API key in any way.
Locate the field labeled API Key, Authorization Key, or Authentication Token in the proxy configuration form. This is where you'll authenticate your Janitor AI requests with your DeepSeek account. The API key you generated earlier serves as your credential for accessing DeepSeek's services.
Retrieve the API key you saved securely after creating it in the DeepSeek developer platform. Paste the key into the API key field by clicking inside the field and using Ctrl+V (Windows/Linux) or Cmd+V (Mac). Alternatively, you can right-click and select Paste from the context menu.
Critical verification step: After pasting, carefully examine the API key in the field to ensure it was copied correctly. Check that there are no extra spaces before the first character or after the last character. Leading or trailing spaces are a common cause of authentication failures. Also verify that the entire key was pasted—API keys are typically long strings, and partial pastes will not work.
Do not modify or edit the API key in any way. The key is generated with specific characters that must remain exactly as created. If you suspect the key may be incorrect or corrupted, return to the DeepSeek platform and generate a new key rather than trying to guess or modify the existing one.
Save and Apply the Proxy Configuration
Review all the fields you've entered in the proxy configuration form to ensure accuracy.
Once you've verified all entries, click the Add Configuration or Save Configuration button at the bottom of the form.
After clicking save, you should see a confirmation message or visual indicator that the configuration was successfully created.
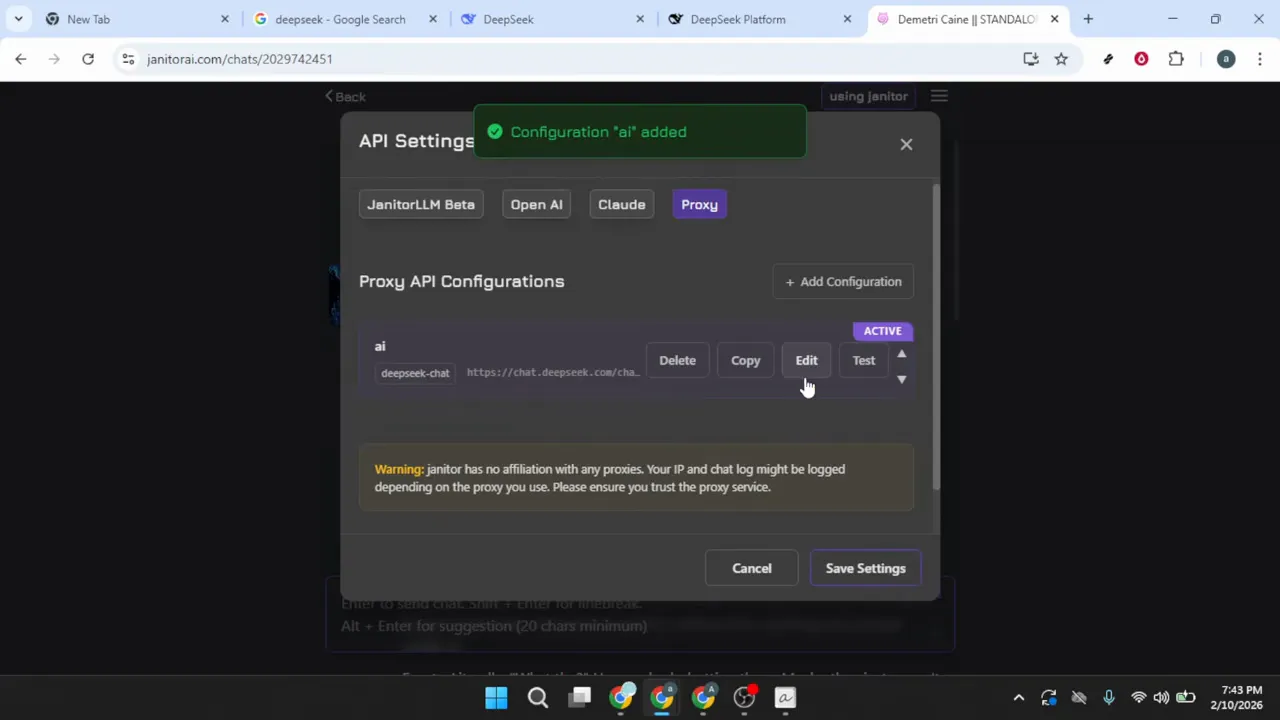
Review all the fields you've entered in the proxy configuration form to ensure accuracy. Check the configuration name, model name ("deepseek-chat"), proxy URL ("https://chat.deepseek.com"), endpoint path ("/chat/completions"), and API key. Each field must be correct for the connection to function properly.
Once you've verified all entries, click the Add Configuration or Save Configuration button at the bottom of the form. The button text may vary depending on your Janitor AI interface version. This action saves your proxy settings and makes them available for use in your chats.
After clicking save, you should see a confirmation message or visual indicator that the configuration was successfully created. The new DeepSeek configuration should now appear in your list of available proxy options. Some interfaces automatically set the newly created configuration as active, while others require you to select it manually.
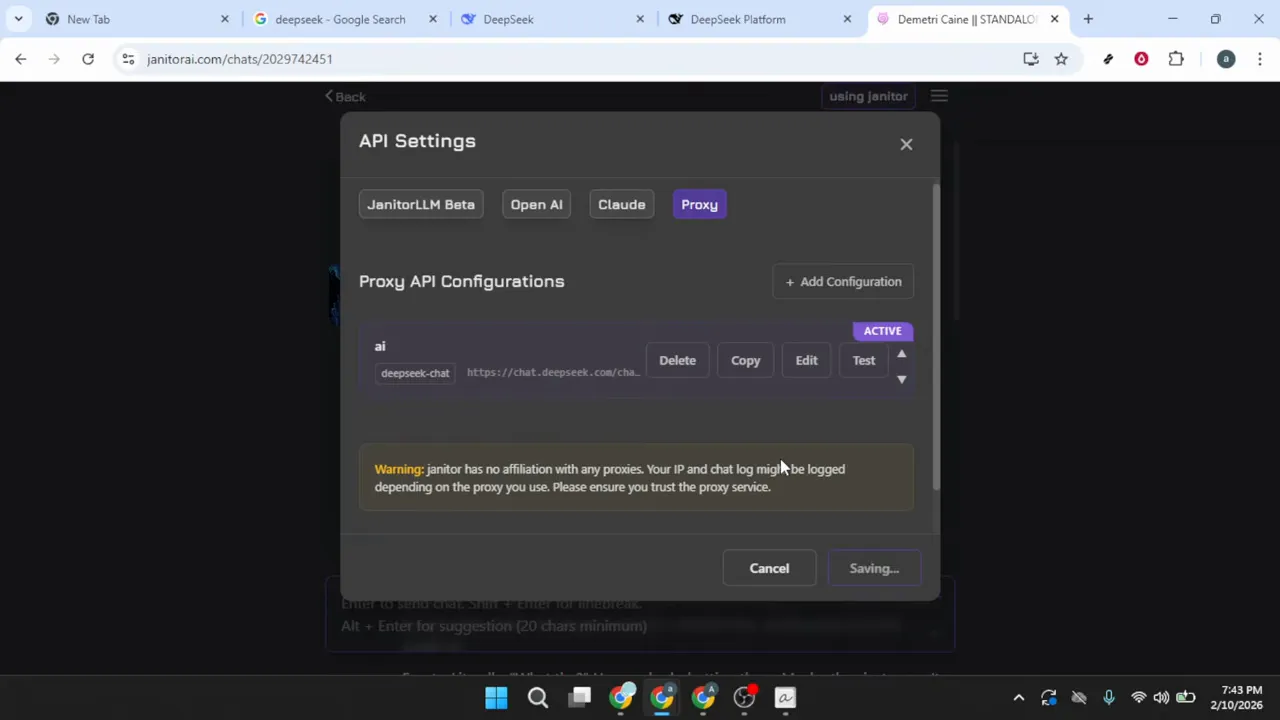
Click Save Settings or Apply Changes if there's an additional save button outside the configuration form. This final save step ensures that your settings are stored persistently and will remain active even after you close and reopen Janitor AI.
This section covers the video content from 02:23 to the end (approximately 02:43), where we finalize and save the connection. 02:23
Test the DeepSeek Connection
Return to your Janitor AI chat interface where you initially accessed the settings.
Type a test message into the chat input field—something simple like "Hello" or "Can you hear me?
After a few moments, you should receive a response generated by DeepSeek's language model.
Return to your Janitor AI chat interface where you initially accessed the settings. Depending on your browser and Janitor AI's configuration, you may need to refresh the page to ensure the new proxy settings are fully loaded. Press F5 or click your browser's refresh button if the interface doesn't update automatically.
Type a test message into the chat input field—something simple like "Hello" or "Can you hear me?" will work perfectly. Press Enter or click the send button to submit your message. This first message tests whether Janitor AI can successfully communicate with DeepSeek's API using your configured settings.
After a few moments, you should receive a response generated by DeepSeek's language model. The response time may vary depending on your internet connection and DeepSeek's server load, but typically ranges from 1-5 seconds. The response should be coherent and contextually appropriate to your test message.
If you receive an error message instead of a response, proceed to the troubleshooting steps below. Common error messages include "API key invalid," "Connection timeout," or "Model not found"—each indicating a specific configuration issue.
Troubleshoot Connection Issues
If your first message doesn't generate a response, don't worry—configuration issues are common and usually easy to resolve.
Verify the model name first, as this is the most common source of errors.
Review the endpoint path if your configuration uses a separate field for this.
If your first message doesn't generate a response, don't worry—configuration issues are common and usually easy to resolve. Open the API settings through the same menu you used earlier (the three-line icon in the top right corner). Navigate back to the proxy configuration tab.
Verify the model name first, as this is the most common source of errors. Ensure "deepseek-chat" is spelled exactly as shown, with lowercase letters and a hyphen. Check the proxy URL to confirm it reads "https://chat.deepseek.com" with no extra characters or missing letters.
Review the endpoint path if your configuration uses a separate field for this. It should read "/chat/completions" with a forward slash at the beginning. Finally, re-examine your API key field to ensure there are no spaces before or after the key string.
If you discover an error in any field, make the correction and click Save Configuration again. After saving, refresh the Janitor AI page to ensure the updated settings are loaded. Attempt another test message.
API Key Validation: If errors persist, return to the DeepSeek developer platform and verify that your API key is still active and hasn't been revoked. You can also generate a new API key and replace the old one in your Janitor AI configuration. This eliminates the possibility of a corrupted or invalid key.
Some browser extensions, particularly ad blockers or privacy tools, can interfere with API connections. Try temporarily disabling extensions or testing in a private/incognito browser window to rule out extension conflicts.
Manage Your API Security
Now that your connection is working, it's important to understand how to maintain security over time.
If you ever need to revoke access—for example, if you suspect your key has been compromised—log into the DeepSeek developer platform.
After deleting the key in DeepSeek, remember to also remove or update the configuration in Janitor AI.
Now that your connection is working, it's important to understand how to maintain security over time. Your API key grants access to your DeepSeek account and potentially incurs usage costs depending on your plan. Proper key management prevents unauthorized access and unexpected charges.
If you ever need to revoke access—for example, if you suspect your key has been compromised—log into the DeepSeek developer platform. Navigate to the API Keys section where you originally created the key. Locate the key you want to revoke in the list and click the delete or revoke button next to it.
After deleting the key in DeepSeek, remember to also remove or update the configuration in Janitor AI. Open the API settings, go to your proxy configurations, and either delete the DeepSeek configuration or update it with a new API key. Leaving an invalid key in your Janitor AI settings will cause connection errors until updated.
Best practice for long-term security: Consider rotating your API keys periodically—every 90 days is a reasonable interval for most users. Create a new key, update your Janitor AI configuration, test the connection, and delete the old key. This practice limits the window of vulnerability if a key is ever inadvertently exposed.
You can also monitor your API usage through the DeepSeek developer dashboard. Regular monitoring helps you detect unusual activity that might indicate unauthorized use of your key. Set up usage alerts if DeepSeek offers this feature.
Copy-paste prompts that work
Each prompt has been tested and optimized for this workflow. Customize the bracketed sections.
Hello, can you help me write a professional email to my team about the quarterly project updates?
Explain the key differences between API endpoints and base URLs in a way a non-technical person would understand.
What are the best practices for rotating API keys every 90 days without disrupting service?
Debug this configuration issue: I'm getting an 'API key invalid' error even though I just created the key. What could cause this?
Compare the response speeds and pricing of DeepSeek, OpenAI, and Anthropic APIs for chat applications.
Create a security audit checklist for API key management and access control.
Janitor AI Technical Specifications
| Free Tier | ✓ Yes |
| Api Access | ✗ No |
| Mobile App | ✓ Yes |
| Voice Mode | ✗ No |
| Web Search | ✗ No |
| File Upload | ✗ No |
| Code Execution | ✗ No |
| Context Window | Unknown |
| Image Generation | None |
| Plugins Extensions | ✓ Yes |
| Context Window Desc | The platform does not publish a specific token or word limit for JanitorLLM. |
Common issues
Go further
When managing multiple Janitor AI configurations or using DeepSeek with other platforms, key isolation provides granular security control and makes usage tracking more transparent in your DeepSeek dashboard.
This matters especially if you're on a limited free tier or pay-per-token plan—conversation context grows with each exchange, and a 50-message thread uses significantly more tokens per response than a fresh chat would.
Many users lose their working configurations after browser updates or cache clears and must troubleshoot the entire setup again, wasting time trying to remember exact formatting details.
More tutorials
Works well with this
Learn how to connect alternative AI providers to Janitor AI or compare OpenAI's API setup with DeepSeek's configuration process.
Automate Janitor AI workflows and integrate DeepSeek-powered conversations with other business applications and services.
Build complex automation workflows that route conversations between Janitor AI, DeepSeek, and multiple third-party services.
This tutorial was created by Joshua Kishaba and produced using AI-assisted editorial tools. All recommendations reflect genuine editorial opinion based on hands-on testing. This page may contain affiliate links — see our full disclosure.