How to Use Google Gemini to Automatically Transcribe Audio or Video to Text in 2026
Learn how to use Google Gemini to automatically transcribe audio and video files into text transcripts for free with this comprehensive step-by-step tutorial.
This page may contain affiliate links. We may earn a commission at no extra cost to you. Full disclosure.
- 01Open Google.com and search for "Google Gemini"
- 02Click the official Google Gemini link from search results
- 03Click the **(+)** icon to upload your audio or video file
- 04Type your transcription prompt in the text field
- 05Click **Submit** to begin transcription processing
- 06Review your completed transcript on screen
Introduction
Google Gemini offers a powerful, free solution for converting audio and video files into accurate text transcripts. This AI tool eliminates the tedious manual work traditionally associated with transcription, making it accessible for content creators, students, researchers, and professionals across all industries.
Whether you're working with video clips, podcast recordings, or audio interviews, Google Gemini transforms your media files into written transcripts in minutes. By the end of this tutorial, you'll upload any audio or video file and receive a complete, searchable text transcript ready for immediate use.
This guide follows the exact workflow demonstrated in the video, ensuring you can replicate each step successfully. We'll cover everything from accessing the Google Gemini platform to submitting your files and retrieving your finished transcripts.
Navigate to Google Search
Launch any modern web browser such as Chrome, Firefox, Safari, or Edge on your computer.
This establishes your starting point for reaching the Google Gemini platform.

Launch any modern web browser such as Chrome, Firefox, Safari, or Edge on your computer. Type google.com into the address bar or open a new tab if Google is your default search engine.
This establishes your starting point for reaching the Google Gemini platform. The Google homepage serves as the gateway to all Google services and tools. As covered in the video from 0:28 to 0:41, this foundational step ensures you're beginning from the correct location. Make sure you have a stable internet connection before proceeding.
Search for Google Gemini
Locate the search bar in the center of the screen.
Press Enter on your keyboard or click the Google Search button to execute your search.

Locate the search bar in the center of the screen. Click inside the search bar and type "Google Gemini" exactly as shown.
Press Enter on your keyboard or click the Google Search button to execute your search. The search results page will display multiple links related to Google Gemini, including the official platform, news articles, and related information about Google's AI tool. As demonstrated in the video from [0:41] to [0:55], searching directly through Google ensures you'll find the legitimate platform rather than third-party sites. The following step will help you identify and click on the correct link from these search results.
Access the Official Google Gemini Platform
From the search results displayed on your screen, carefully identify the official Google Gemini website link.
Click on the official Google Gemini link to open the platform.

From the search results displayed on your screen, carefully identify the official Google Gemini website link. The official link typically appears at or near the top of the search results and will have a URL that includes google.com/gemini or similar official Google domain.
Click on the official Google Gemini link to open the platform. The page should load within a few seconds depending on your internet connection speed. As shown in the video from 0:55 to 1:10, clicking the correct link takes you directly to the platform where transcription work begins. If prompted, you may need to sign in with your Google account to access the full functionality of the platform.
Upload Your Audio or Video File
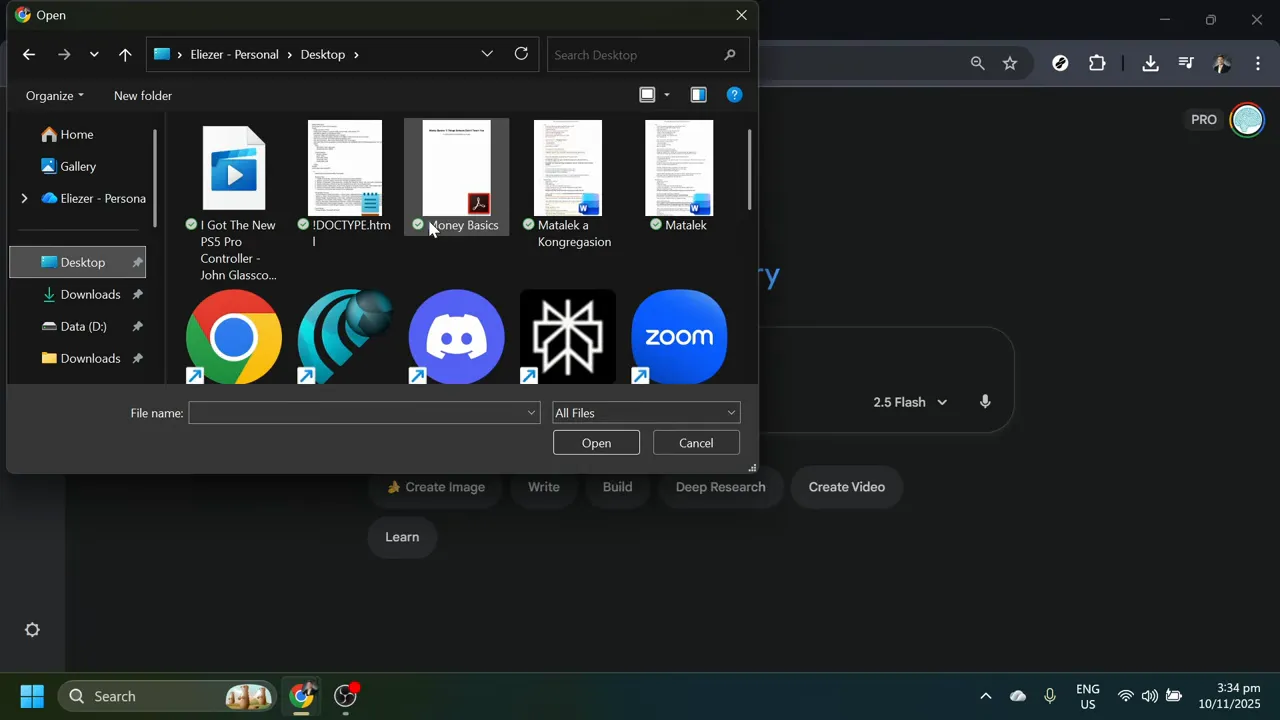
On the Google Gemini interface, locate the plus sign (+) icon, typically positioned near the text input area.
Click on the (+) icon to open the file upload dialog.
Google Gemini supports various file formats including MP4, MOV, AVI for video, and MP3, WAV, M4A for audio.
On the Google Gemini interface, locate the plus sign (+) icon, typically positioned near the text input area. This icon represents the file upload function that allows you to add media files to the platform.
Click on the (+) icon to open the file upload dialog. A window will appear allowing you to browse your computer's files and folders. Navigate to the location where your audio or video file is stored on your device. Select the audio or video file you wish to transcribe by clicking on it once to highlight it, then click the Open or Upload button in the dialog window.
Google Gemini supports various file formats including MP4, MOV, AVI for video, and MP3, WAV, M4A for audio. The video demonstrates this process from 1:10 to 1:24, showing how straightforward file uploading is on the platform. Wait for the file upload to complete, which is typically indicated by a progress bar or confirmation message. Upload times vary depending on your file size and internet connection speed. Once uploaded successfully, your file will appear in the Google Gemini interface, ready for processing.
Create Your Transcription Prompt
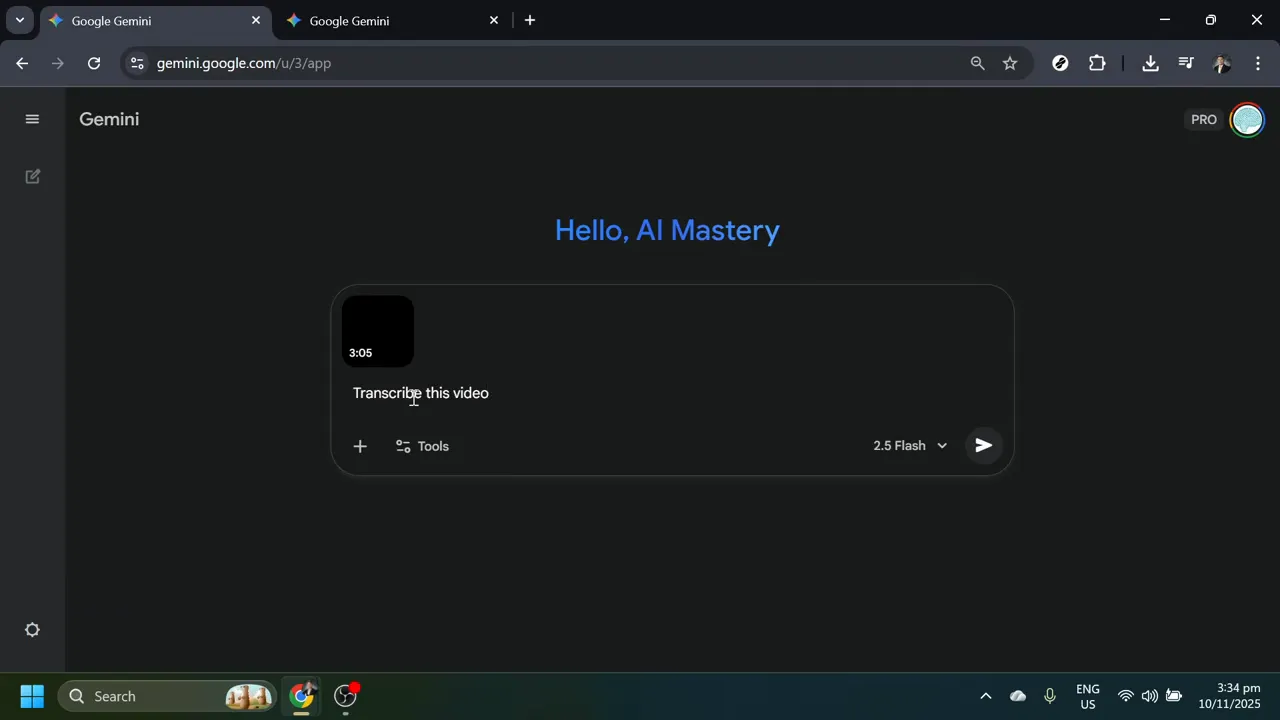
After your file has been successfully uploaded, focus on the text input field that appears on the Google Gemini interface.
Type the following prompt exactly as shown: "transcribe this video".
Ensure your prompt is clear and free of typos before proceeding.
After your file has been successfully uploaded, focus on the text input field that appears on the Google Gemini interface. Position your cursor inside this text field by clicking on it.
Type the following prompt exactly as shown: "transcribe this video". This simple yet effective instruction tells Google Gemini precisely what action you want it to perform. Even if you've uploaded an audio file rather than a video, this prompt works effectively for both media types. The prompt serves as a direct command to Google Gemini's AI engine, as explained in the video from [1:24] to [1:43]. You can also use variations such as "transcribe this audio" or "convert this to text," but the demonstrated prompt is proven to work reliably.
Ensure your prompt is clear and free of typos before proceeding. The quality and clarity of your instruction can impact how the AI processes your request.
Submit Your Transcription Request
Locate the submit button on the Google Gemini interface, which is typically positioned near or adjacent to the text input field where you entered your prompt.
Click the submit button to initiate the transcription process.
Do not close the browser window or navigate away from the page while processing is underway.
Locate the submit button on the Google Gemini interface, which is typically positioned near or adjacent to the text input field where you entered your prompt. This button may be labeled as Submit, Send, or display an arrow icon indicating submission.
Click the submit button to initiate the transcription process. This action sends your uploaded file along with your prompt instruction to Google Gemini's AI processing system. As covered in the video from 1:43 to 2:01, clicking submit triggers Google Gemini to work its processing capabilities on your file. You should see an indicator that the system is working, such as a loading animation, progress indicator, or status message. The transcription process typically takes anywhere from a few seconds to several minutes depending on the length of your audio or video file.
Do not close the browser window or navigate away from the page while processing is underway. Keep the Google Gemini tab open and active to ensure the transcription completes successfully.
Review Your Completed Transcript
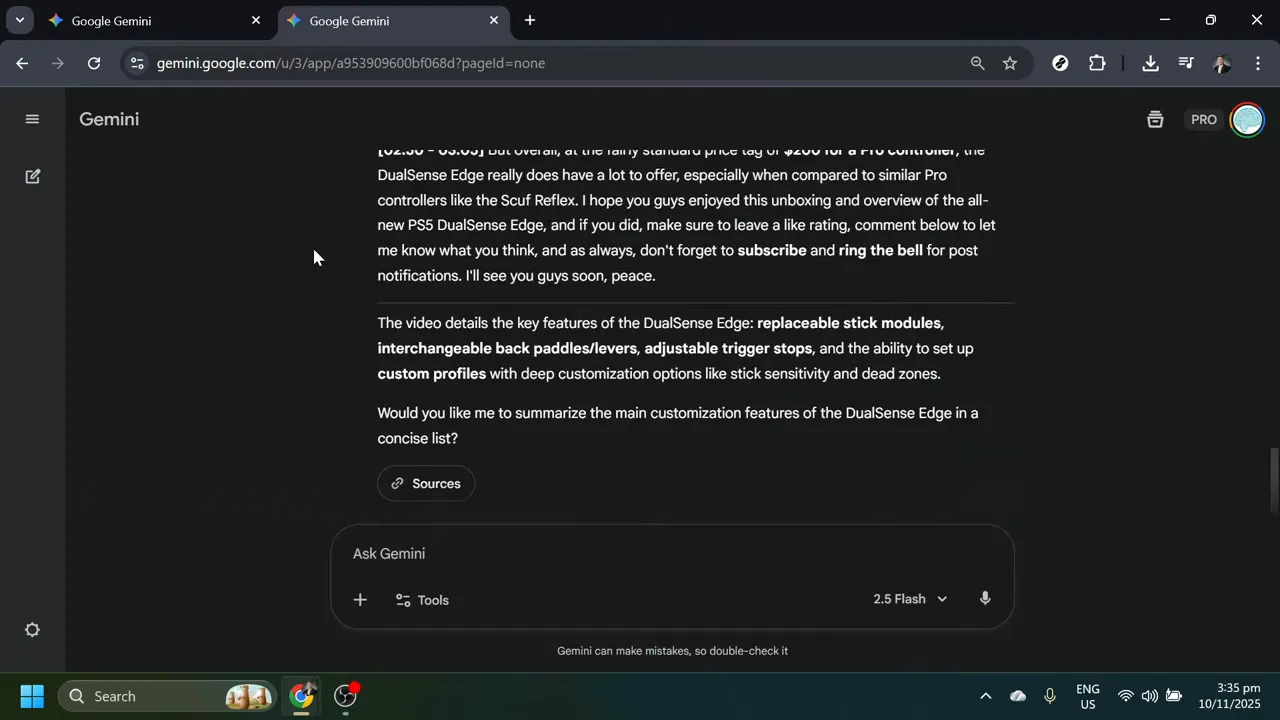
After Google Gemini completes the transcription process, the resulting text will appear directly on your screen within the interface.
Carefully review the transcribed text for accuracy and completeness.
Select the transcript with your cursor and copy it to your clipboard for pasting into other applications like word processors, note-taking apps, or content management systems.

After Google Gemini completes the transcription process, the resulting text will appear directly on your screen within the interface. The transcript displays as plain text, showing the converted spoken content from your audio or video file organized in paragraph form that follows the flow of the original audio.
Carefully review the transcribed text for accuracy and completeness. Google Gemini's AI is highly accurate, but you may occasionally find minor errors or misinterpretations, especially with technical terms, accents, or poor audio quality. As demonstrated in the video from 2:01 to 2:12, the process is remarkably streamlined and efficient. You'll have a complete text version of your audio or video file ready for immediate use.
Select the transcript with your cursor and copy it to your clipboard for pasting into other applications like word processors, note-taking apps, or content management systems. The entire process from upload to completed transcript typically takes just a few minutes. Use this text for subtitles, documentation, content repurposing, accessibility purposes, or any other application requiring written versions of spoken content.
Access Audio Playback Options (Optional)
If you want to listen to the audio portion of your uploaded file while viewing the transcript, Google Gemini provides a convenient audio playback feature.
Click on the three-dot menu icon to reveal additional options related to your file.
The audio playback feature provides standard controls such as play, pause, and potentially timeline scrubbing.
If you want to listen to the audio portion of your uploaded file while viewing the transcript, Google Gemini provides a convenient audio playback feature. Look for the three-dot menu icon (also called an ellipsis or more options icon) somewhere near your uploaded file or transcript area.
Click on the three-dot menu icon to reveal additional options related to your file. A dropdown menu or options panel will appear displaying various functions available for your uploaded content. Select the Listen option from the menu as shown in the video from [2:12] to [2:30]. This activates audio playback functionality, allowing you to hear the original audio content while simultaneously reviewing the written transcript. This feature is particularly useful for verifying transcription accuracy or for situations where you need both audio and text access.
The audio playback feature provides standard controls such as play, pause, and potentially timeline scrubbing. You can listen to specific sections of your audio while comparing them against the transcribed text.
Complete Your Transcription Workflow
You have now successfully completed the entire process of transcribing audio or video files using Google Gemini.
Whether you uploaded a video clip or a pure audio file, Google Gemini handled the transcription with ease and efficiency.
Experiment with different types of audio and video content to see how effectively Google Gemini handles various recording qualities, accents, and subject matters.

You have now successfully completed the entire process of transcribing audio or video files using Google Gemini. The platform has converted your spoken content into written text format that you can immediately use for your projects.
Whether you uploaded a video clip or a pure audio file, Google Gemini handled the transcription with ease and efficiency. The tool provides reliable transcription results from your uploads, as emphasized in the video from 2:30 to 2:52. You can repeat this process with any audio or video files you need transcribed in the future. The transcription remains accessible in your Google Gemini interface for you to reference, copy, or export as needed. Start new transcription projects by simply uploading different files and repeating the same straightforward process. Google Gemini makes professional-quality transcription accessible and free for all users.
Experiment with different types of audio and video content to see how effectively Google Gemini handles various recording qualities, accents, and subject matters. The more you use this tool, the more you'll discover ways to integrate transcription into your content creation, research, or business workflows.
Copy-paste prompts that work
Each prompt has been tested and optimized for this workflow. Customize the bracketed sections.
transcribe this video
transcribe this audio
convert this audio to text
provide a transcript of this video
transcribe the spoken content in this file
create a text transcript from this audio file
transcribe this recording into written text for accessibility
generate a complete transcript of this file
Gemini Technical Specifications
| Free Tier | ✓ Yes |
| Api Access | ✓ Yes |
| Mobile App | ✓ Yes |
| Voice Mode | ✓ Yes |
| Web Search | ✓ Yes |
| File Upload | ✓ Yes |
| Code Execution | ✓ Yes |
| Context Window | Up to ~1M tokens on select models; 32K+ on free tier for guided learning |
| Image Generation | Built-in Google image generation and editing |
| Plugins Extensions | ✓ Yes |
| Context Window Desc | Free users typically get tens of thousands of tokens per session, while paid tiers and Pro/Ultra models can handle very long documents, codebases, and research packs. |
Common issues
Go further
This matters when you're working with larger files or multiple transcription projects and need to optimize your workflow efficiency throughout the day.
This is especially important for field recordings, interviews in noisy environments, or older audio files where quality may be compromised, saving you significant editing time on the final transcript.
This organization method becomes critical when managing multiple transcription projects simultaneously and needing to quickly locate specific transcripts for reference or editing later.
More tutorials
Works well with this
This tutorial was created by Joshua Kishaba and produced using AI-assisted editorial tools. All recommendations reflect genuine editorial opinion based on hands-on testing. This page may contain affiliate links — see our full disclosure.