Create Viral History Videos with AI for Free in 2026 | Complete Step-by-Step Tutorial
Learn how to create engaging viral history videos using free AI tools including ChatGPT, Leonardo AI, ElevenLabs, and CapCut with this comprehensive 2026 tutorial.
This page may contain affiliate links. We may earn a commission at no extra cost to you. Full disclosure.
Introduction
Create engaging history videos using completely free AI tools that attract millions of views across social media platforms. This guide walks through every step—from script creation to final video export—using ChatGPT, Leonardo AI, ElevenLabs, and CapCut. By the end, you'll produce professional-quality historical content that captivates audiences on YouTube, TikTok, and Instagram.
Historical content channels are experiencing explosive growth, with some reaching over 380,000 subscribers in just 6 months and generating 50 million views monthly. These videos combine compelling storytelling with AI-generated visuals and voiceovers to create highly shareable content. The best part: you can achieve similar results without spending money on expensive software or equipment.
- 01Extract and rewrite the source video transcript using ChatGPT
- 02Generate Leonardo AI image prompts from your rewritten script
- 03Create 5-8 historical images using Leonardo AI with 9:16 aspect ratio
- 04Produce voiceover audio from your script using ElevenLabs
- 05Download royalty-free background music from TuneTank
- 06Assemble all assets into CapCut with synchronized images, captions, and effects
- 07Export the completed video in 1080p for social media distribution
Understand Your Two Script Creation Options
Establish your foundation with a well-crafted script before creating video content.
The second option, which this tutorial focuses on, involves rewriting an existing script from another video.
Establish your foundation with a well-crafted script before creating video content. As explained at 0:38 in the video, you have two primary approaches to script generation. The first option involves asking ChatGPT to generate an original script from scratch based on your chosen historical topic.
The second option, which this tutorial focuses on, involves rewriting an existing script from another video. This approach ensures you're working with content that has already proven engaging to audiences. You'll use this method to create a historical narrative about Napoleon's coronation.
Find and Select Your Source Video
Navigate to YouTube and search for history videos in your chosen topic area.
Once you've identified a suitable video, click to play it and verify the content quality.
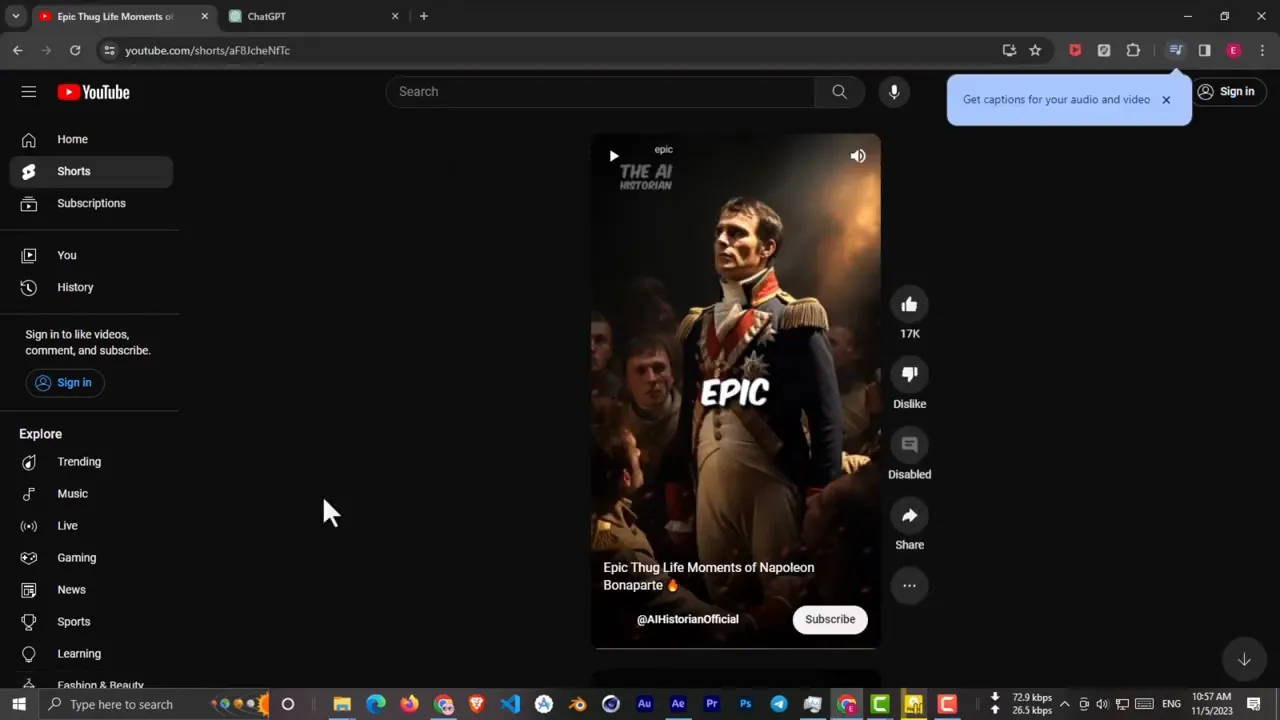
Navigate to YouTube and search for history videos in your chosen topic area. At 0:50, the tutorial demonstrates finding a video about historical figures that interests you. Look for videos with high engagement rates and view counts, as these indicate proven content that resonates with audiences.
Once you've identified a suitable video, click to play it and verify the content quality. The video should have clear narration, interesting facts, and a compelling narrative structure. These elements will serve as the blueprint for your own reimagined version.
Extract the Video Transcript
From the YouTube video page, change the URL by modifying the "short" text to "watch" as shown at [0:56].
Scroll down to the video description section and click on "Show transcript.
This gives you clean text without time codes.
From the YouTube video page, change the URL by modifying the "short" text to "watch" as shown at 0:56. Press Enter to reload the page in the standard YouTube format. This step is necessary because YouTube Shorts don't always display transcript options in the same way as regular videos.
Scroll down to the video description section and click on "Show transcript." A panel will appear with the full transcript of the video. Click on the three-dot menu icon within the transcript panel and toggle off the timestamps option at 1:08.
This gives you clean text without time codes. Select all the transcript text and copy it to your clipboard. You now have the raw material that ChatGPT will transform into your unique script.
Rewrite the Script with ChatGPT
Open ChatGPT in your browser and create a new chat session.
ChatGPT will process the text and generate a completely rewritten version that maintains factual accuracy while changing the phrasing and structure.
Save this rewritten script as you'll need it for both image generation and voiceover creation.
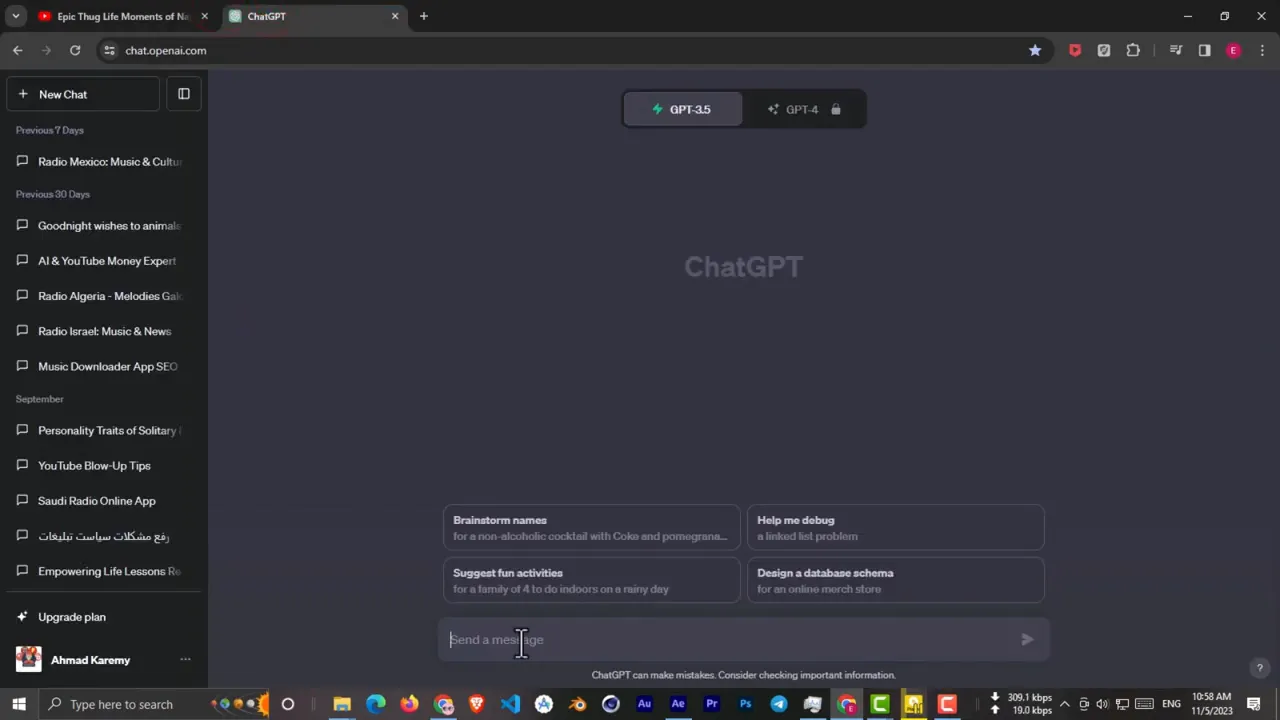
Open ChatGPT in your browser and create a new chat session. Type a prompt asking ChatGPT to rewrite the text you're about to provide, making it unique while maintaining the core historical facts. Paste the copied transcript into the chat at 1:18.
ChatGPT will process the text and generate a completely rewritten version that maintains factual accuracy while changing the phrasing and structure. The AI may also add supplementary historical information to enrich the narrative. Review the rewritten script to ensure it flows naturally and maintains engagement throughout.
Save this rewritten script as you'll need it for both image generation and voiceover creation. The script serves as the master document that guides every subsequent step in your video production process.
Generate Image Prompts for Leonardo AI
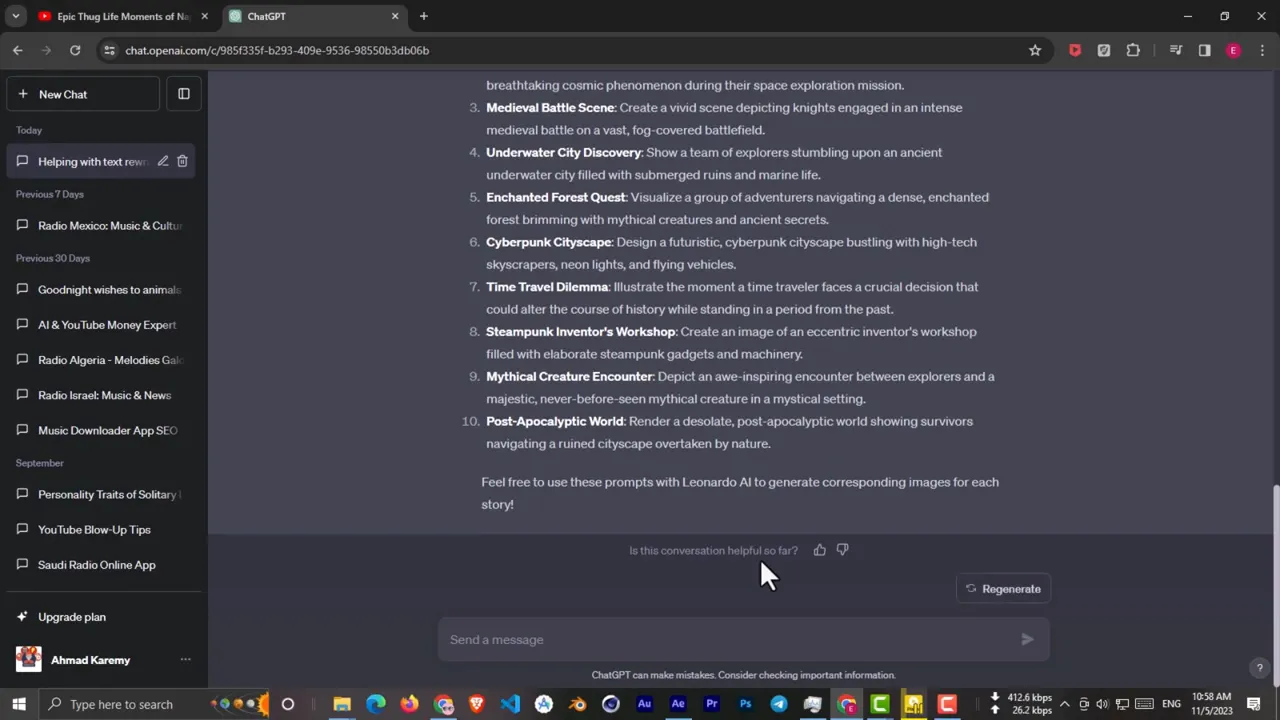
Within the same ChatGPT conversation, ask the AI to create a list of detailed prompts for Leonardo AI to generate images for each part of your story.
While ChatGPT generates helpful starting points, the tutorial notes at [1:38] that these automated prompts sometimes don't work optimally.
Create prompts that describe historical scenes, portraits of key figures, and atmospheric settings.
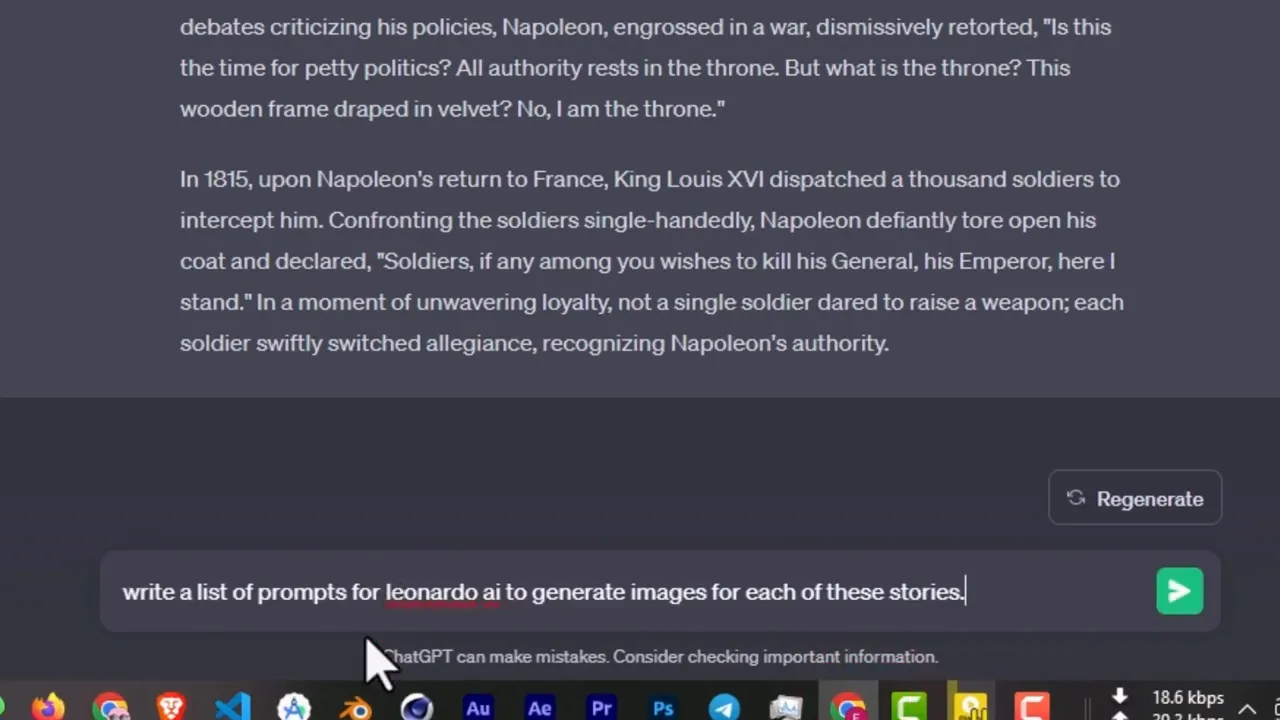
Within the same ChatGPT conversation, ask the AI to create a list of detailed prompts for Leonardo AI to generate images for each part of your story. This step occurs at 1:30 in the video tutorial. ChatGPT will analyze your script and create specific visual descriptions that correspond to different segments of your narrative.
While ChatGPT generates helpful starting points, the tutorial notes at 1:38 that these automated prompts sometimes don't work optimally. For best results, review each prompt and refine it yourself. Add specific details about lighting, composition, historical accuracy, and mood to ensure the generated images match your vision.
Create prompts that describe historical scenes, portraits of key figures, and atmospheric settings. Each prompt should be detailed enough to guide the AI but flexible enough to allow for creative interpretation. Aim for prompts that specify artistic style, time period details, and emotional tone.
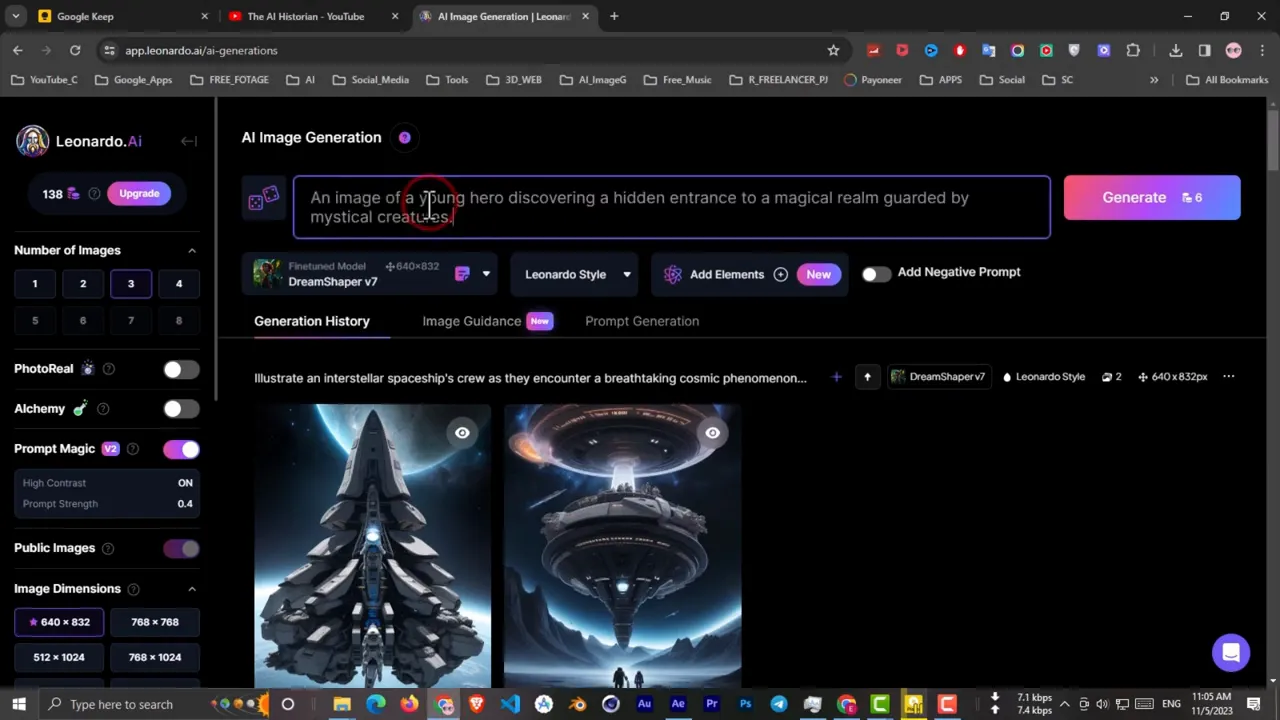
Create Historical Images with Leonardo AI
Navigate to Leonardo AI (app.
From the left sidebar, select 3 for the number of images to generate per prompt.
Select the 9:16 aspect ratio (960 pixels), which is optimized for vertical video formats used on YouTube Shorts, TikTok, and Instagram Reels.
Navigate to Leonardo AI (app.leonardo.ai) and sign in to your account. Click on AI Image Generation as demonstrated at [1:44] in the tutorial. This opens the main image creation interface where you'll configure your generation settings.
From the left sidebar, select 3 for the number of images to generate per prompt. Ensure that Prompt Magic is toggled on, as this feature enhances the AI's interpretation of your descriptions. Scroll down to find the aspect ratio settings at [1:54].
Select the 9:16 aspect ratio (960 pixels), which is optimized for vertical video formats used on YouTube Shorts, TikTok, and Instagram Reels. Verify that Dream Shaper V7 is selected as your AI model. This model produces high-quality historical and realistic imagery suitable for educational content.
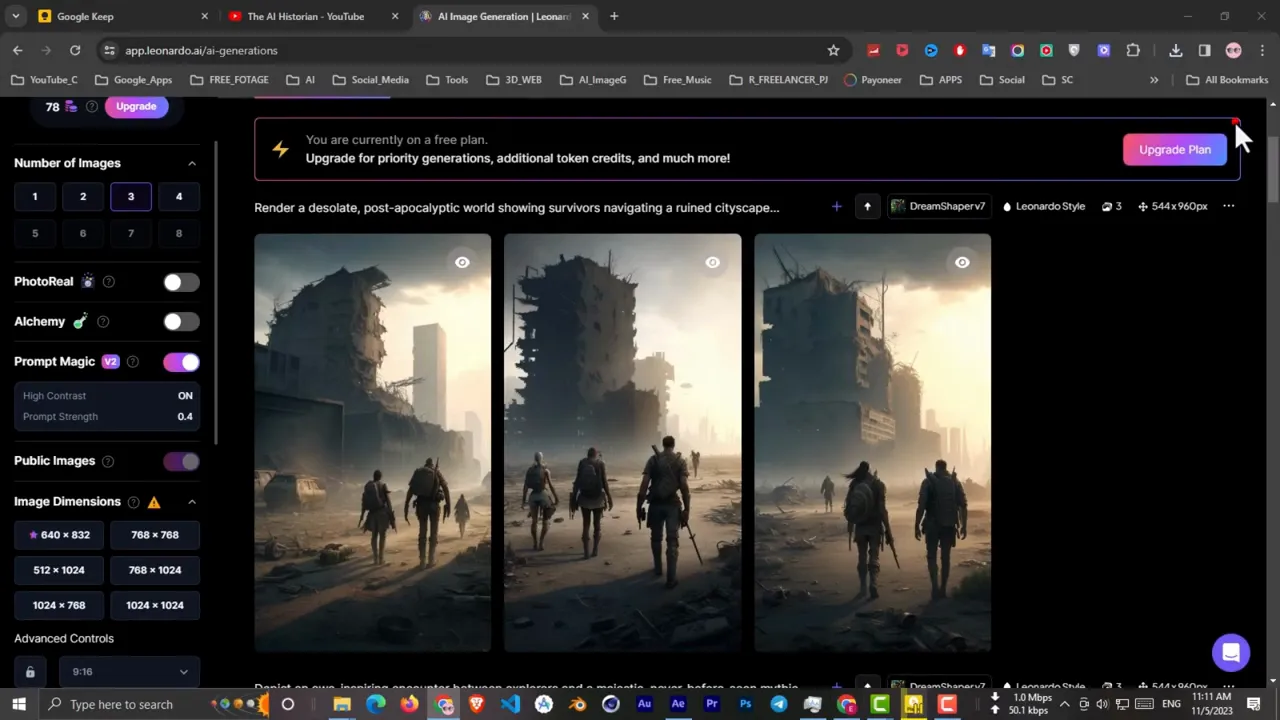
Generate and Download Your Images
Copy your first prompt from ChatGPT and paste it into the Leonardo AI prompt field.
Review the three generated images and select the one that best matches your narrative needs.
Repeat this entire process for each prompt that ChatGPT generated for your script, as shown at [2:18].
Copy your first prompt from ChatGPT and paste it into the Leonardo AI prompt field. Click the Generate button at [2:09] and wait for the AI to create your images. The generation process typically takes 10-30 seconds depending on server load.
Review the three generated images and select the one that best matches your narrative needs. Consider composition, historical accuracy, and visual appeal when making your selection. Click the download button to save the image to your computer.
Repeat this entire process for each prompt that ChatGPT generated for your script, as shown at 2:18. Organize your downloaded images in a dedicated folder, naming them sequentially to match the order they'll appear in your video. This organization will streamline your editing process later.
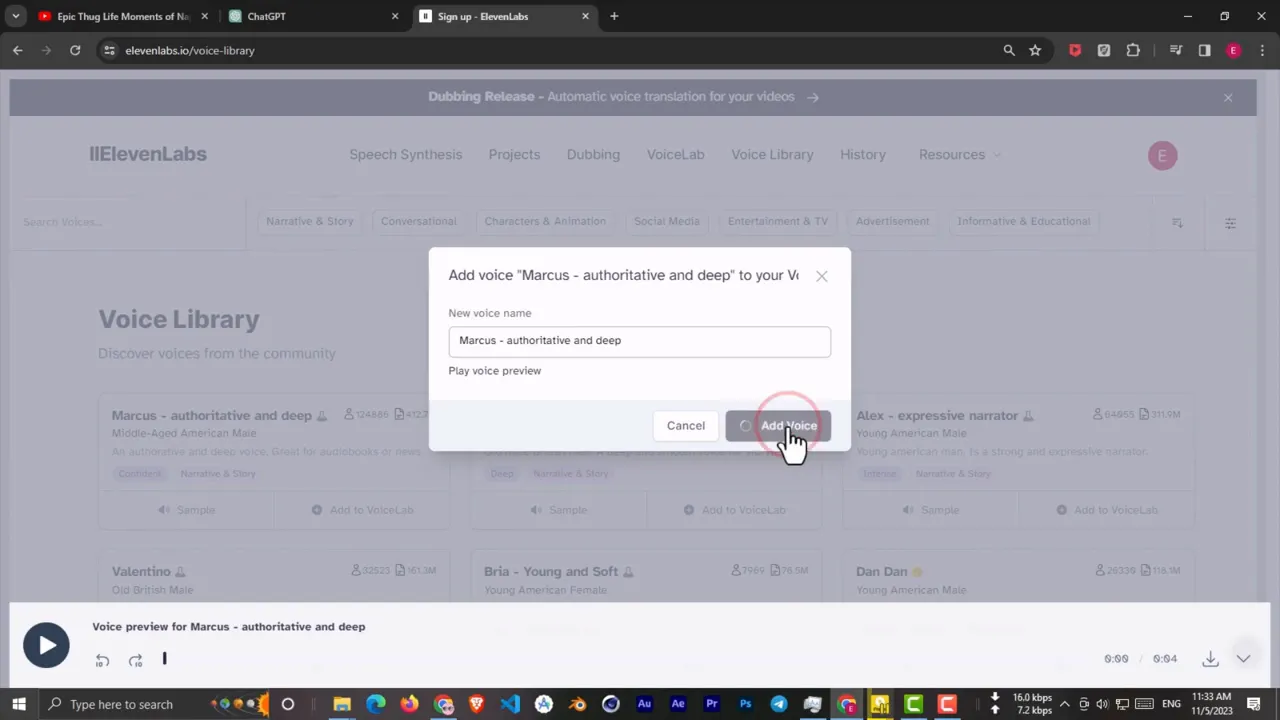
Create AI Voiceover with ElevenLabs
Navigate to ElevenLabs (elevenlabs.
Once logged in, click on Voice Library to browse available voice options.
When you find the ideal voice, click **Add to Voice Lab.
Navigate to ElevenLabs (elevenlabs.io) and sign up for a free account at 2:29. ElevenLabs provides high-quality AI-generated voices that sound remarkably natural. The free tier offers sufficient character limits for creating short-form historical videos.
Once logged in, click on Voice Library to browse available voice options. Listen to various voice samples by clicking the play button next to each voice at [2:37]. Choose a voice that matches the tone and authority appropriate for historical narration—typically deeper, measured voices work well for this content type.
When you find the ideal voice, click Add to Voice Lab. This saves the voice to your personal collection for immediate use. Consider factors like clarity, pacing, and gravitas when selecting your narrator voice.
Generate and Download Your Voiceover
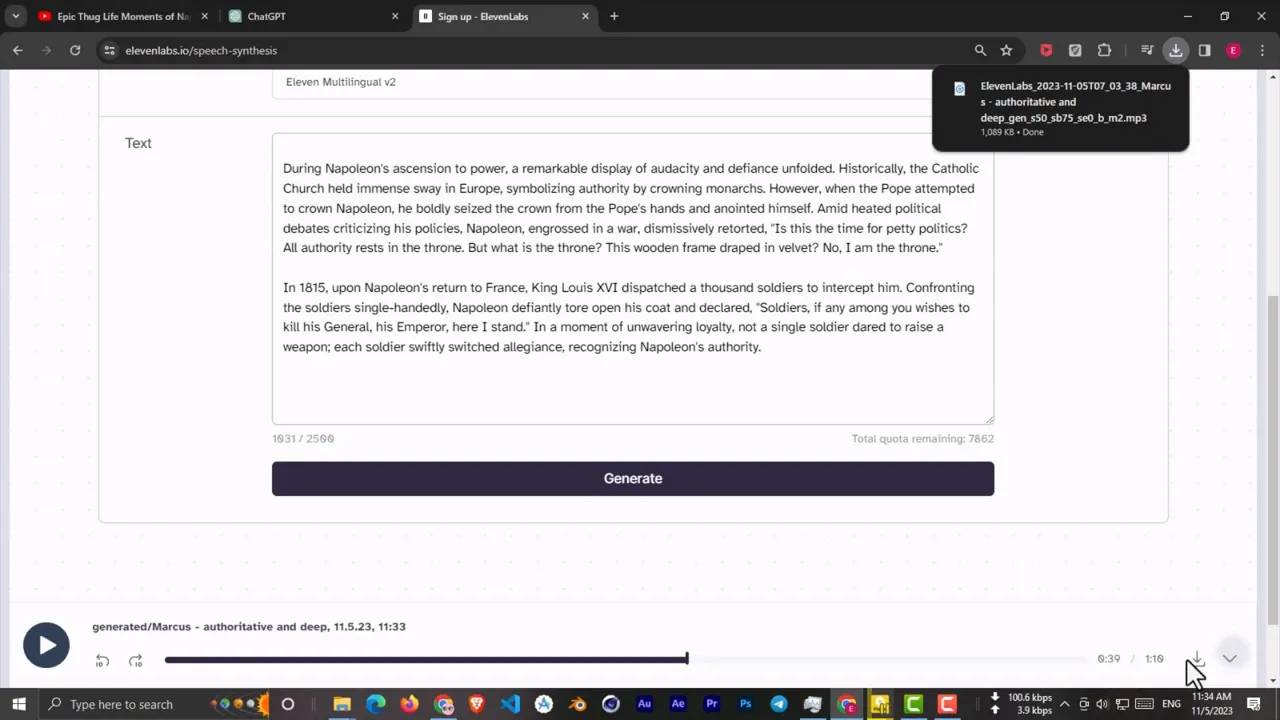
Navigate to the Speech Synthesis section within ElevenLabs at [2:51].
Paste the script into the text field in ElevenLabs at [2:57].
When the generation completes at [3:02], listen to the voiceover to ensure quality and proper pronunciation of historical names and terms.
Navigate to the Speech Synthesis section within ElevenLabs at [2:51]. Select the voice you just added from your voice lab collection. Return to ChatGPT and copy your complete rewritten script.
Paste the script into the text field in ElevenLabs at [2:57]. Double-check for any formatting issues or unusual characters that might affect pronunciation. Click the Generate button and wait for the AI to process your script into speech.
When the generation completes at 3:02, listen to the voiceover to ensure quality and proper pronunciation of historical names and terms. If satisfied, click the download button to save the audio file. Store this file in the same project folder as your images for easy access during editing.
Download Royalty-Free Background Music
Visit TuneTank (tunetank.
Browse the music library by genre, selecting Epic at [3:17] to find dramatic orchestral pieces that complement historical narratives.
Once you've identified the perfect background track at [3:22], download it to your project folder.
Visit TuneTank (tunetank.com) and create a free account as shown at 3:07. TuneTank provides royalty-free music specifically designed for content creators. The platform is ideal for finding background music that won't trigger copyright claims on social media platforms.
Browse the music library by genre, selecting Epic at [3:17] to find dramatic orchestral pieces that complement historical narratives. Preview several tracks to find music that enhances your story without overwhelming the narration. Look for tracks with rising crescendos and emotional peaks that align with dramatic moments in your script.
Once you've identified the perfect background track at 3:22, download it to your project folder. Choose music with moderate intensity that can sit comfortably beneath your voiceover while adding emotional depth.
Set Up Your CapCut Project
Navigate to CapCut (capcut.
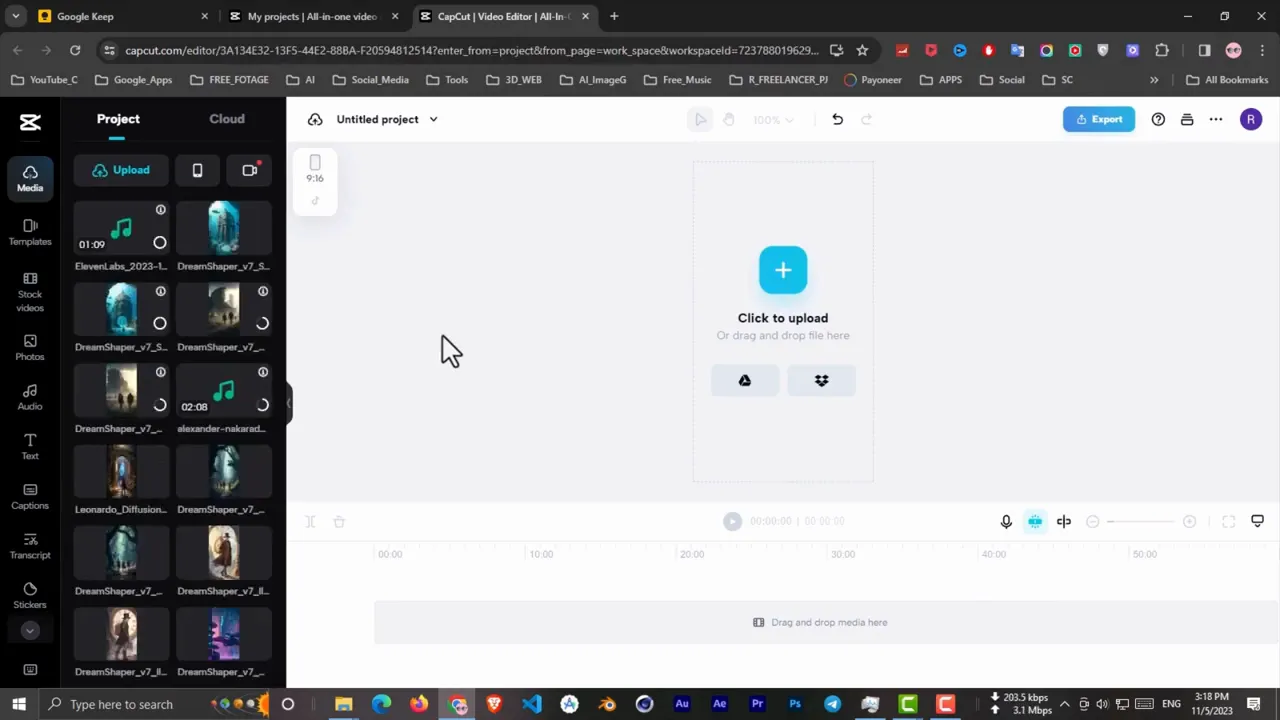
From the left sidebar, locate the Media section and click to open the upload panel at [3:34].
Wait for all uploads to complete before proceeding.
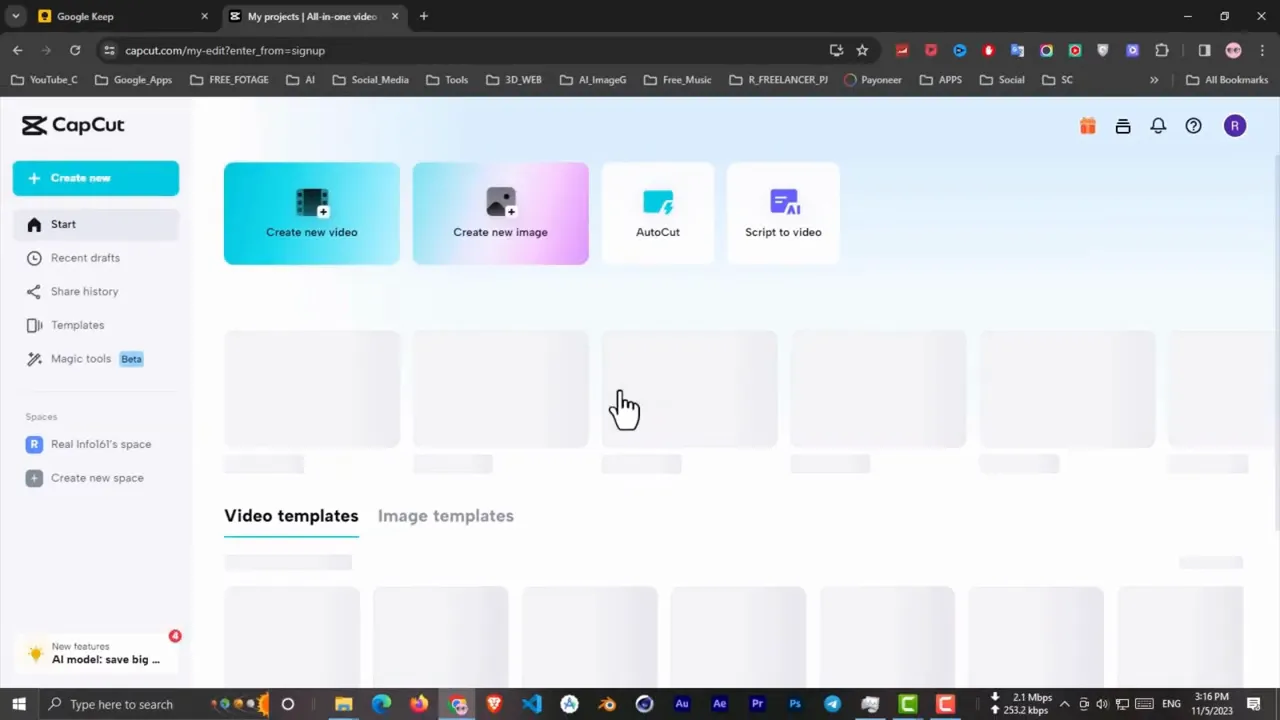
Navigate to CapCut (capcut.com) and click Create New Video at [3:27]. Select the 9:16 aspect ratio, which is specifically designed for YouTube Shorts and TikTok vertical video format at [3:30]. This ensures your content displays properly on mobile devices where most short-form content is consumed.
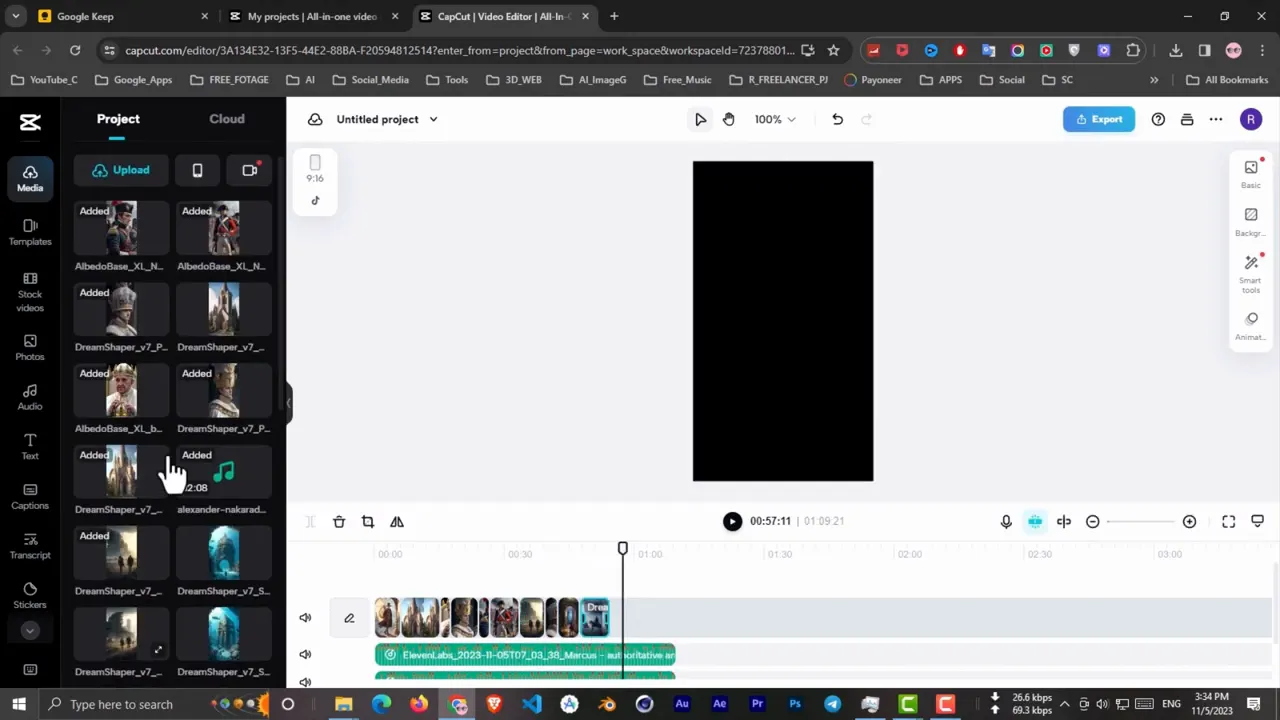
From the left sidebar, locate the Media section and click to open the upload panel at [3:34]. Upload all your project assets: the AI-generated images, the ElevenLabs voiceover, and your TuneTank background music. CapCut will process these files and make them available in your media library.
Wait for all uploads to complete before proceeding. Organizing your media before editing begins streamlines the workflow and prevents interruptions during the creative process.
Build Your Video Timeline Foundation
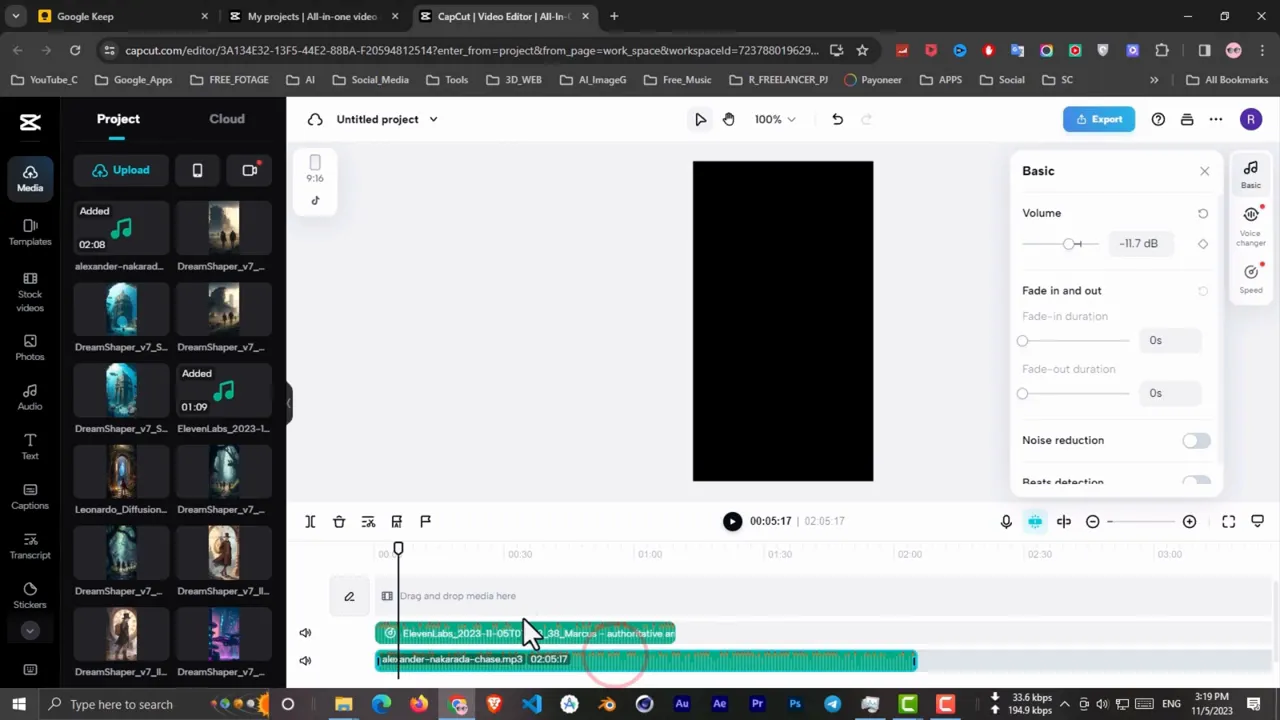
Drag your ElevenLabs voiceover file from the media library to the timeline at [3:42].
Drag your background music to a second audio track beneath the voiceover at [3:45].
Select the background music track and click Basic from the right-side properties panel at [3:51].
Drag your ElevenLabs voiceover file from the media library to the timeline at 3:42. This audio track serves as the foundation of your video, dictating the overall length and pacing. Position it on the primary audio track at the timeline's beginning.
Drag your background music to a second audio track beneath the voiceover at 3:45. Adjust the music track's position so it starts at the same point as your narration. Extend or trim the music to match the approximate length of your voiceover.
Select the background music track and click Basic from the right-side properties panel at [3:51]. Locate the volume slider and reduce the music volume to approximately 20-30% of the voiceover level at [3:54]. This ensures the narration remains clear and dominant while the music provides atmospheric support.
Synchronize Images with Narration
Add your Leonardo AI images to the video track above your audio at [4:00].
Adjust the duration of each image by dragging its edges on the timeline.
Continue this process at [4:04] until all images are synchronized with their corresponding narration segments.
Add your Leonardo AI images to the video track above your audio at 4:00. Listen to your voiceover and place each image at the point where the narration discusses that particular scene or subject. This synchronization ensures your visuals directly support the spoken content.
Adjust the duration of each image by dragging its edges on the timeline. Images should remain on screen long enough for viewers to appreciate the details but change frequently enough to maintain visual interest. Generally, 3-8 seconds per image works well for most historical content.
Continue this process at 4:04 until all images are synchronized with their corresponding narration segments. Preview your timeline to ensure smooth visual progression and that no gaps exist between images.
Generate Automatic Captions
Click the Transcript button in CapCut's toolbar at [4:09].
Click the auto-caption generation button and wait for CapCut's AI to process your audio.
When processing completes at [4:20], review the generated captions for accuracy.
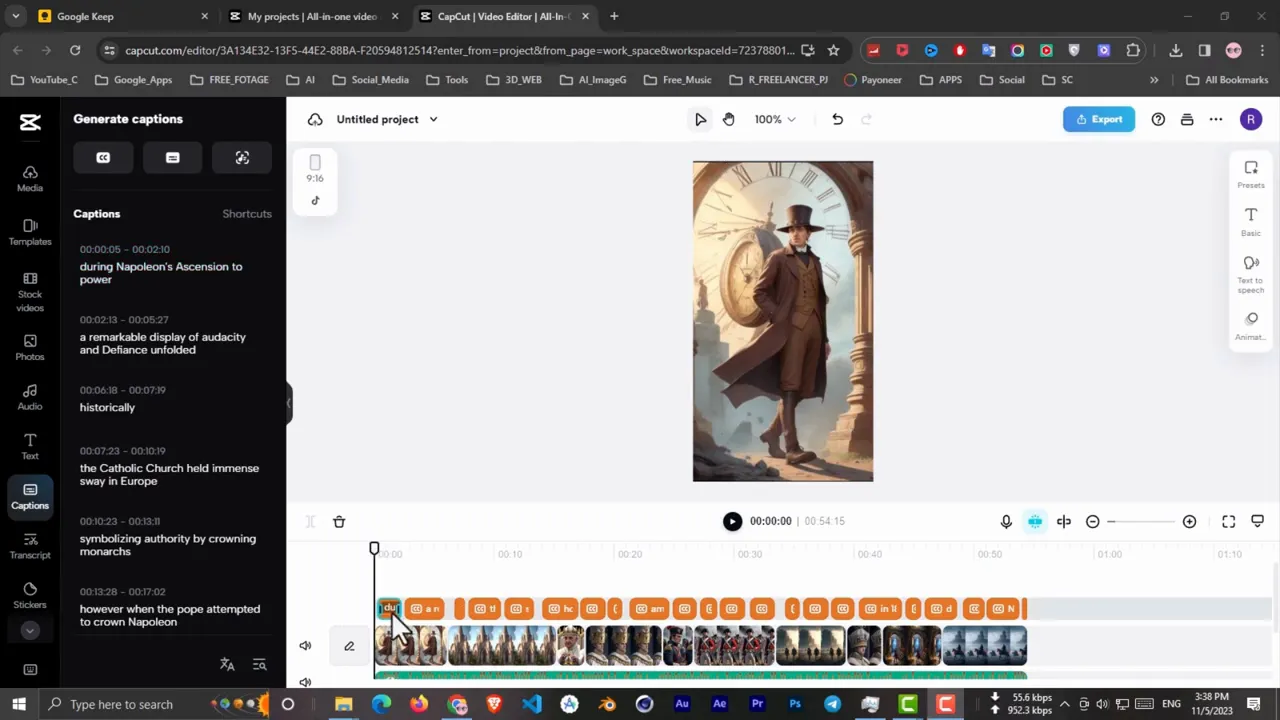
Click the Transcript button in CapCut's toolbar at [4:09]. Select your voiceover audio track from the dropdown menu. Click the Transcript button again to initiate automatic caption generation at [4:16].
Click the auto-caption generation button and wait for CapCut's AI to process your audio. The software will analyze the speech patterns and create time-coded text captions that appear in sync with the narration. This process typically takes 1-3 minutes depending on audio length.
When processing completes at 4:20, review the generated captions for accuracy. While CapCut's speech recognition is quite accurate, occasionally check for misheard words, especially with historical names and terminology.
Style Your Caption Text
Select the subtitle track on your timeline and click Preset from the right properties panel at [4:22].
Navigate to Basic Settings within the subtitle properties at [4:25].
Customize additional text properties like stroke, shadow, and background to maximize legibility at [4:28].
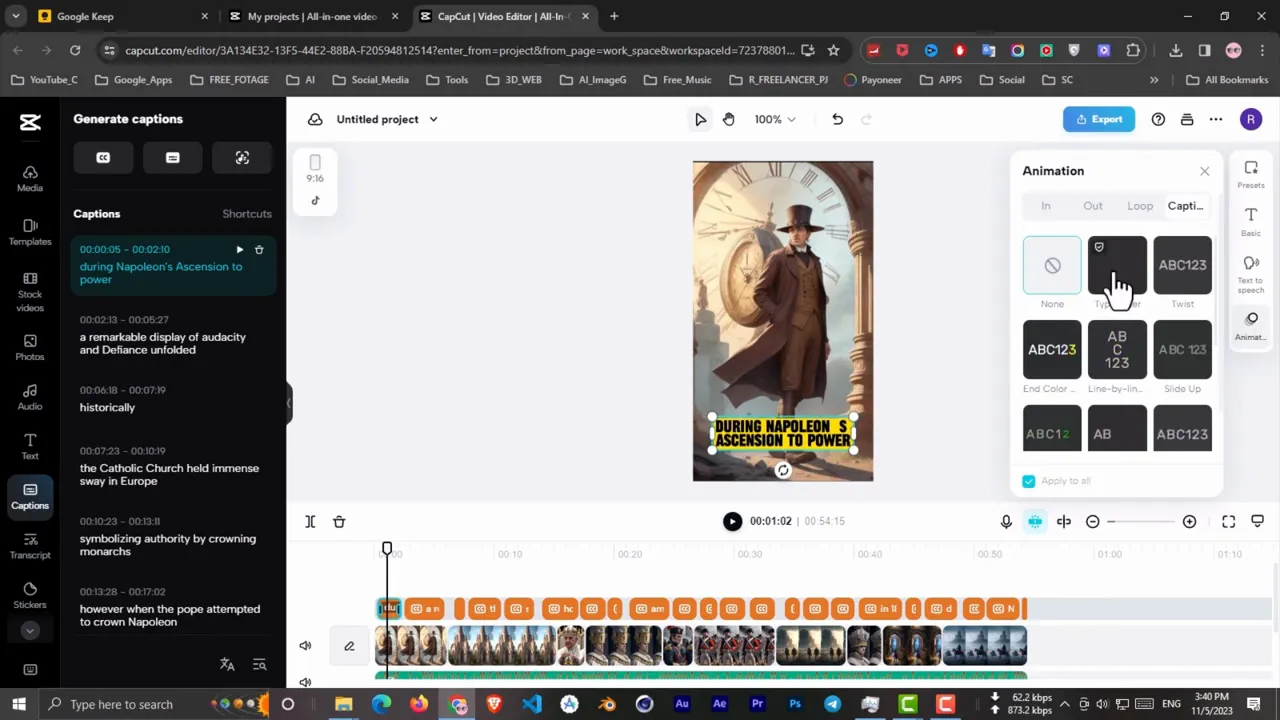
Select the subtitle track on your timeline and click Preset from the right properties panel at [4:22]. Browse through CapCut's built-in caption styles and choose one that offers good readability against your historical images. Bold, high-contrast styles typically work best for educational content.
Navigate to Basic Settings within the subtitle properties at [4:25]. Change the font to something clear and authoritative—sans-serif fonts like Montserrat or Roboto work well for historical content. Adjust the font size, color, and positioning to ensure captions are easily readable on mobile devices.
Customize additional text properties like stroke, shadow, and background to maximize legibility at [4:28]. From the Animation section, select the first animation option at [4:35], which typically provides a subtle word-by-word appearance effect that enhances engagement without being distracting.
Add Motion to Your Images
Click on the first image in your timeline at [4:38].
Select an animation that adds life to the static image without being overly dramatic or distracting from the content.
Repeat this process for all images in your timeline at [4:51].
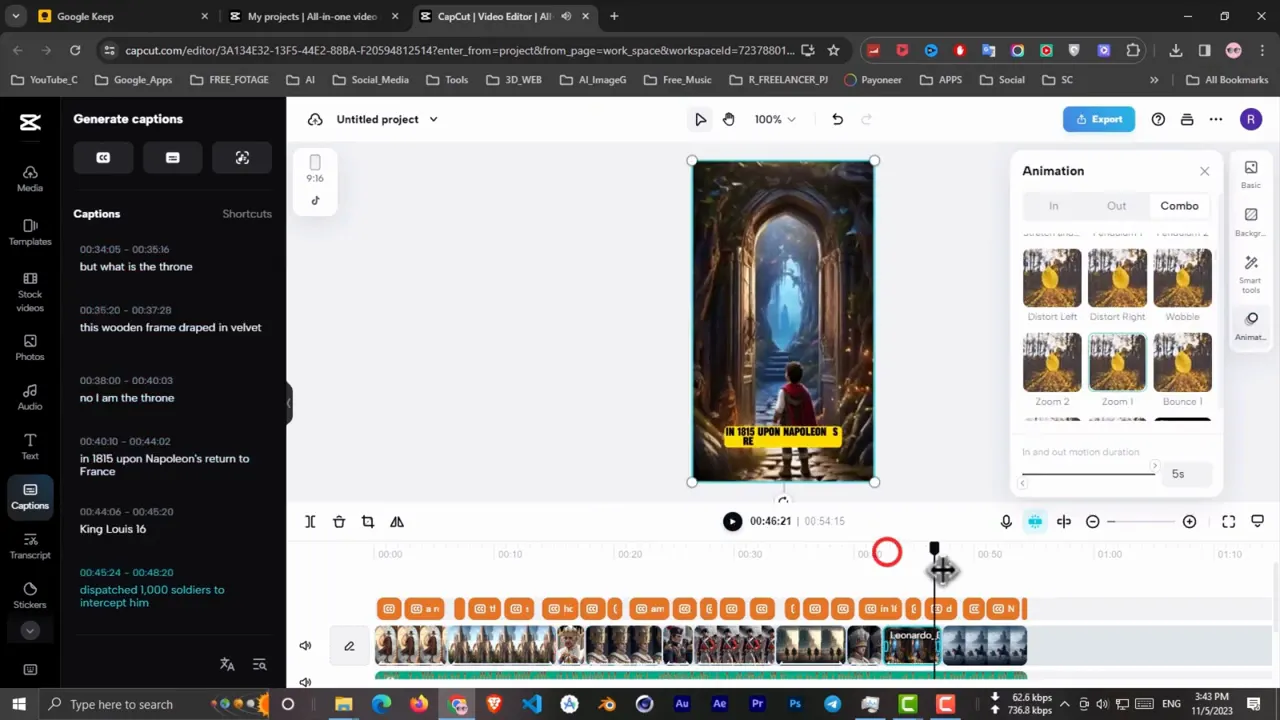
Click on the first image in your timeline at [4:38]. From the right properties panel, click Animation to reveal motion preset options. Browse the available animations at [4:45], looking for subtle movements like slow zooms, pans, or Ken Burns effects.
Select an animation that adds life to the static image without being overly dramatic or distracting from the content. Slow zoom-ins work particularly well for portraits, while gentle pans are effective for landscape or battle scene images. The animation should enhance the storytelling by directing viewer attention to important visual details.
Repeat this process for all images in your timeline at 4:51. Vary the animation types to maintain visual interest—alternating between zoom-ins, zoom-outs, and lateral pans creates dynamic visual rhythm. Ensure each animation completes smoothly before the next image appears.
Apply Visual Effects
Navigate to the Effects section in CapCut's left sidebar at [4:58].
Select effects that complement your specific images and narrative moments at [5:02].
Preview your video with effects applied to ensure they enhance rather than distract from the educational content.
Navigate to the Effects section in CapCut's left sidebar at [4:58]. Browse through available effects, looking for options that enhance the historical atmosphere of your content. Consider effects like vintage film grain, subtle vignettes, or light leaks that add cinematic quality.
Select effects that complement your specific images and narrative moments at 5:02. For example, add a subtle glow effect during triumphant moments in the story, or apply a darker vignette during dramatic conflicts. Apply effects sparingly to avoid overwhelming the content.
Preview your video with effects applied to ensure they enhance rather than distract from the educational content. Effects should feel like natural atmospheric elements that deepen viewer immersion in the historical narrative.
Export Your Completed Video
Once you've completed all editing steps, click the Export button in the top-right corner at [5:12].
Choose a descriptive filename that includes your topic and date for easy organization.
The export process at [5:14] typically takes 2-5 minutes depending on video length and your computer's processing power.

Once you've completed all editing steps, click the Export button in the top-right corner at [5:12]. CapCut will present export settings where you can configure resolution, frame rate, and file format. For social media uploads, select 1080p resolution with H.264 encoding.
Choose a descriptive filename that includes your topic and date for easy organization. Select your export destination folder, preferably the same project folder containing your other assets. Review the export settings one final time before clicking the final export button.
The export process at 5:14 typically takes 2-5 minutes depending on video length and your computer's processing power. CapCut will display a progress bar showing encoding status. When complete, your video is ready for upload to YouTube Shorts, TikTok, Instagram Reels, or other platforms.
Copy-paste prompts that work
Each prompt has been tested and optimized for this workflow. Customize the bracketed sections.
Please rewrite the following historical video transcript to create a unique version while maintaining all factual accuracy. Add additional relevant historical context where appropriate and ensure the narrative flows naturally for a 60-second video: [PASTE TRANSCRIPT]
Based on the script above, create 8 detailed image generation prompts for Leonardo AI. Each prompt should describe a historically accurate scene or portrait that corresponds to a specific part of the narrative. Include details about lighting, composition, time period, and mood. Format as a numbered list.
Cinematic historical portrait of [SUBJECT], [TIME PERIOD], [SPECIFIC DETAILS], dramatic lighting, oil painting style, highly detailed, 16th century European art aesthetic, rich colors, museum quality, historically accurate clothing and setting
Create a 9:16 vertical video featuring Napoleon's rise to power with dramatic historical imagery, orchestral background music at 25% volume, AI-generated narration with proper pronunciation of French historical names, and auto-generated captions with professional styling.
Rewrite this historical narration with natural pauses after major facts: add commas where the speaker should pause briefly, use periods for dramatic stops. Spell out all numbers and replace difficult historical names with phonetic equivalents for text-to-speech accuracy: [PASTE SCRIPT]
Generate image prompts that emphasize [SPECIFIC EMOTION: triumphant, tragic, dramatic, celebratory] moments from this historical narrative, with mood lighting that reinforces the emotional beats and artistic style choices appropriate for educational YouTube content: [PASTE SCRIPT]
Create alternative image prompts for these scenes if the first generation didn't capture the historical accuracy or visual style I need: [LIST ORIGINAL PROMPTS]. Emphasize [SPECIFIC HISTORICAL ACCURACY REQUIREMENTS] and adjust the artistic direction toward [DESIRED VISUAL STYLE].
Convert this script into social media captions optimized for [PLATFORM: YouTube Shorts, TikTok, Instagram Reels], with hashtags for historical content, emotional hooks in the first sentence, and calls-to-action appropriate for educational content: [PASTE SCRIPT]
Common issues
Go further
When creating content about specific historical periods where visual authenticity matters, Alchemy's enhanced rendering produces images that look more like professional historical illustrations rather than generic AI art, significantly increasing perceived production value.
The default settings often produce monotone narration that feels robotic for storytelling. Adjusting these parameters creates voiceovers with the dramatic inflection and emphasis that keeps viewers engaged through educational content, similar to professional documentary narrators.
This creates professional-looking speed ramps that make static images feel cinematic, particularly effective during climactic moments in historical stories. It adds production value that mimics high-budget documentary techniques while requiring only a single click per clip.
More tutorials
Works well with this
ChatGPT is the foundation of this workflow, used for script rewriting, image prompt generation, and content optimization before AI generation.
ElevenLabs generates the natural-sounding voiceover narration that drives engagement and ensures historical names are pronounced correctly.
CapCut serves as the central editing hub where all assets (images, voiceover, music, captions) are synchronized and styled into the final video product.
This tutorial was created by Joshua Kishaba and produced using AI-assisted editorial tools. All recommendations reflect genuine editorial opinion based on hands-on testing. This page may contain affiliate links — see our full disclosure.